Backpacking the Kalalau Trail at the Nā Pali Coast in Kauai

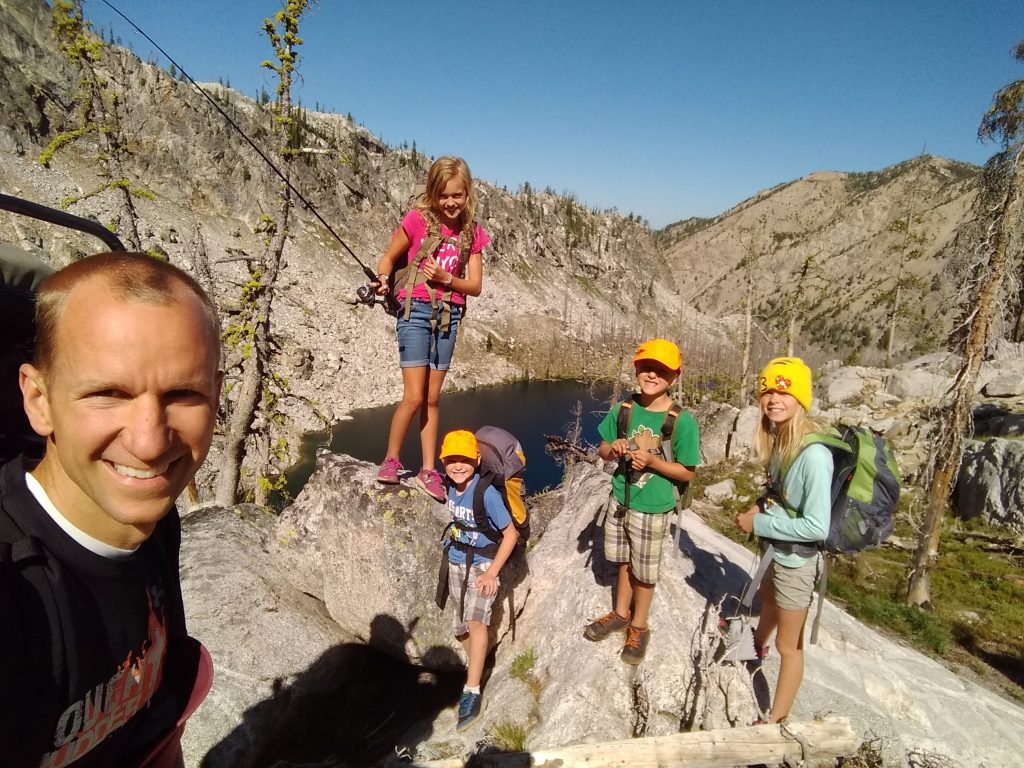
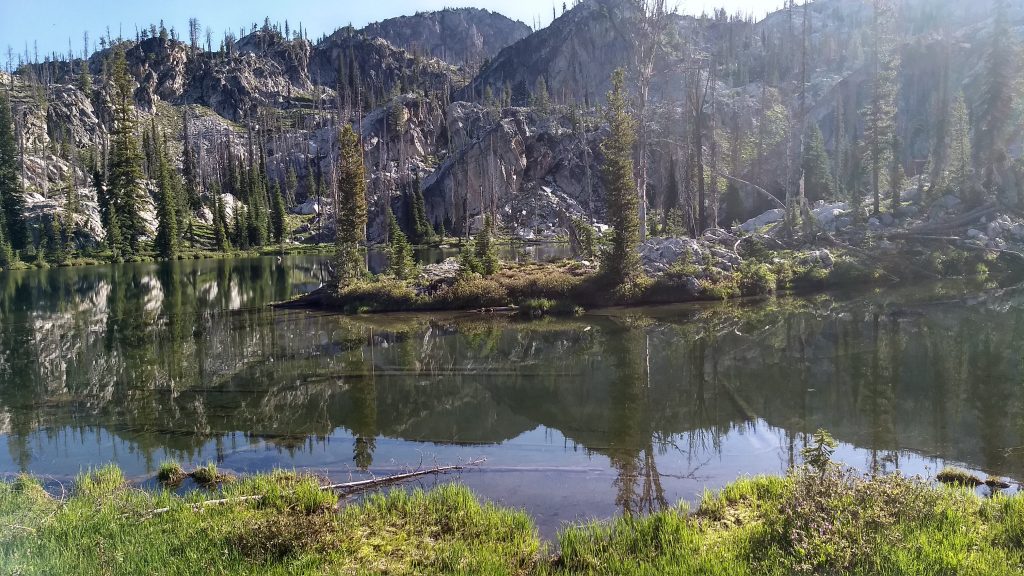
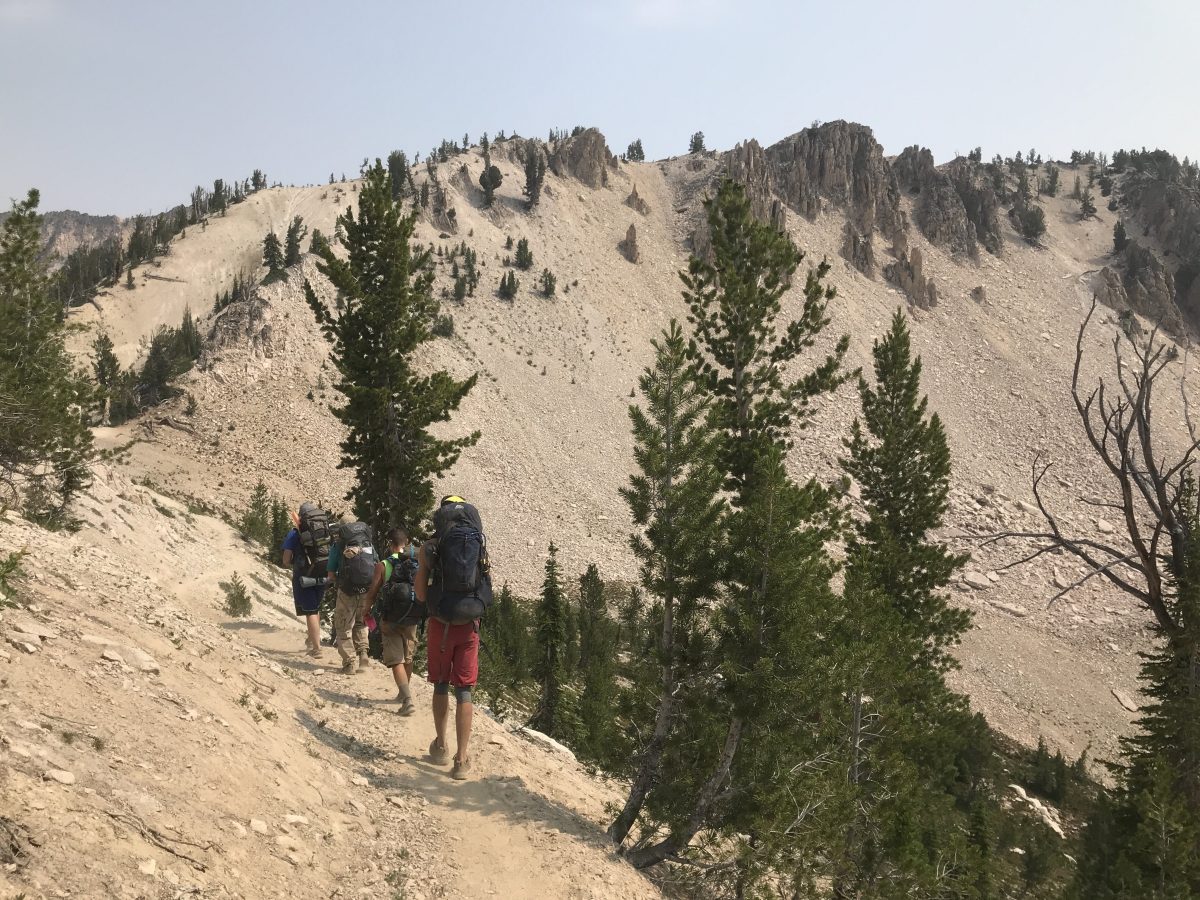
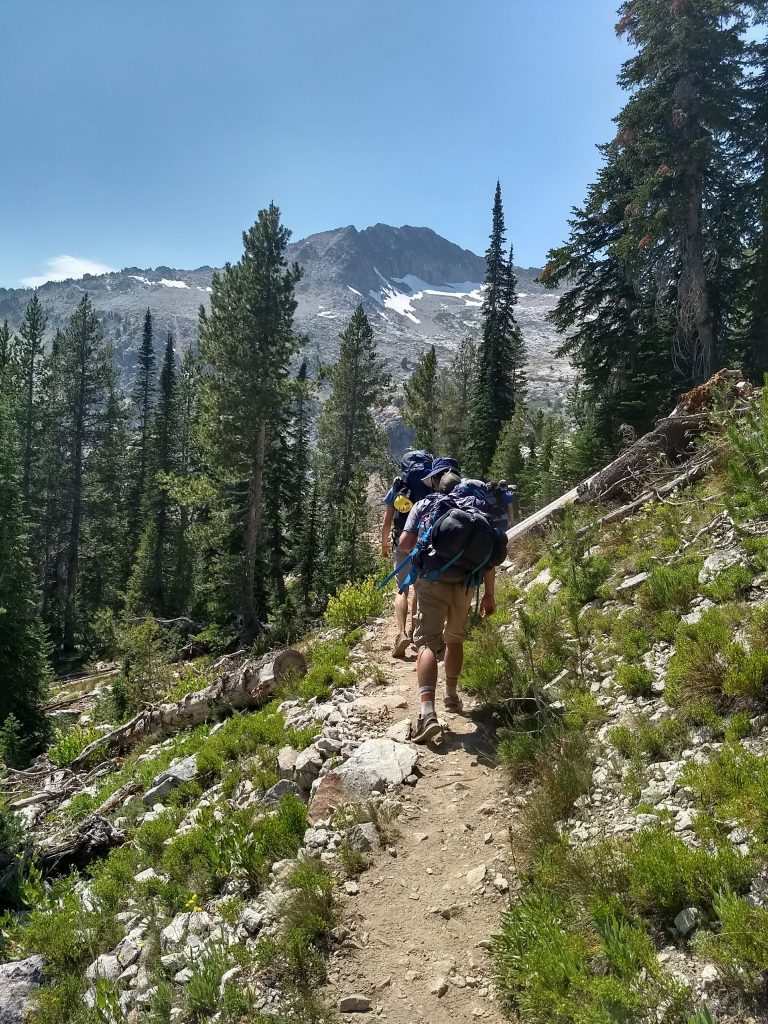
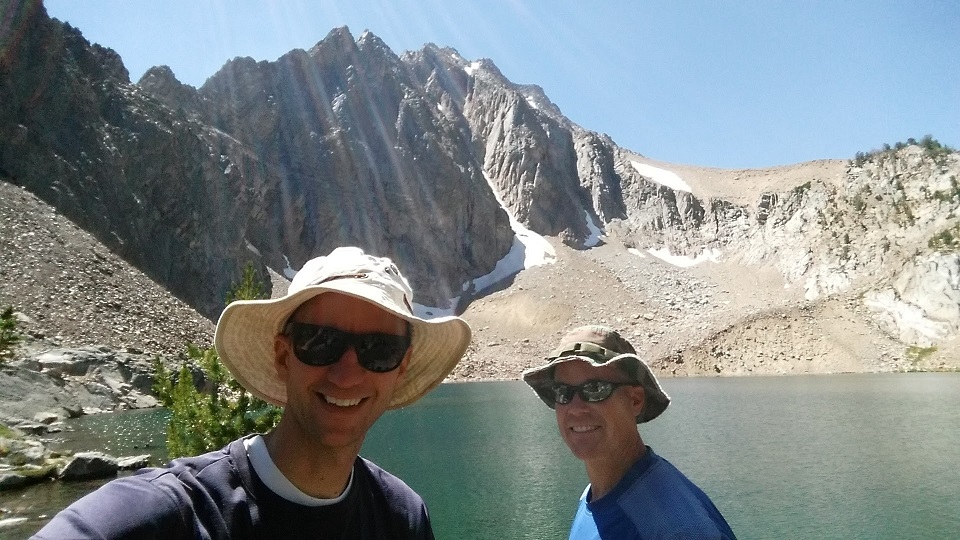
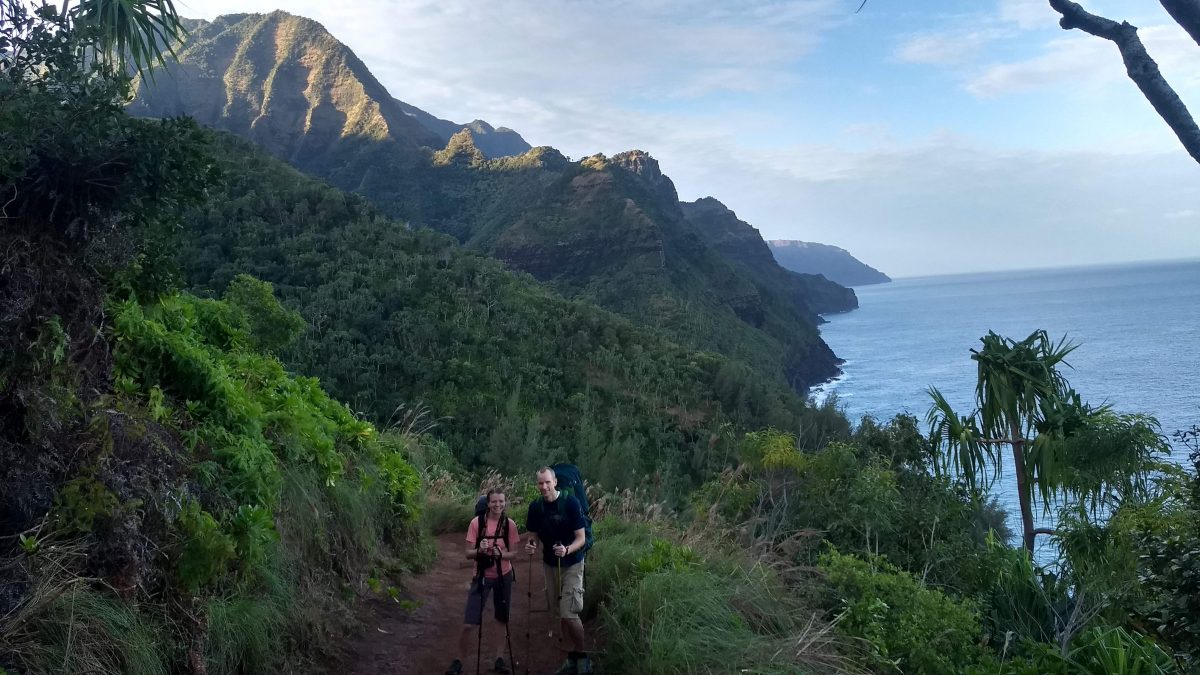
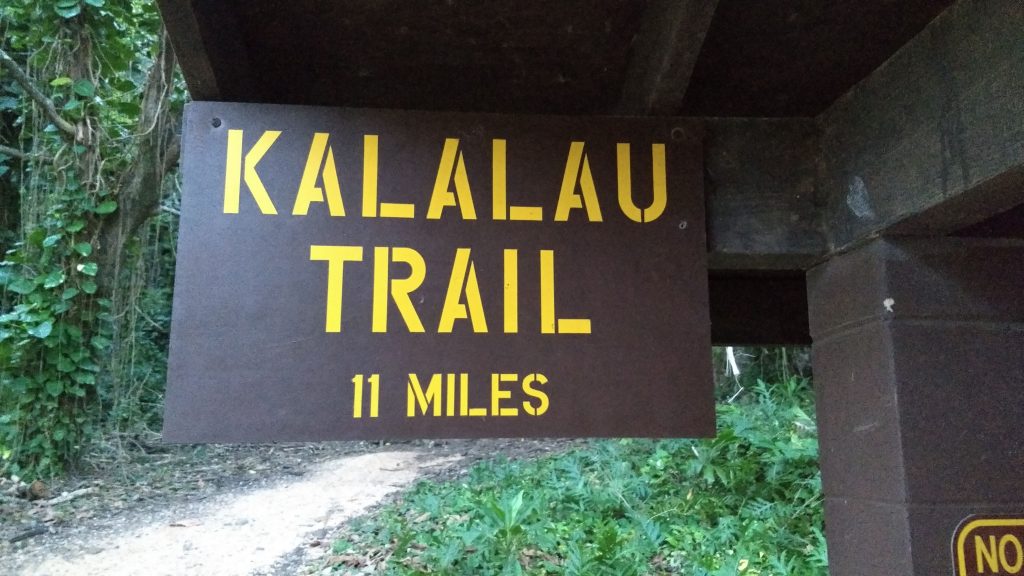
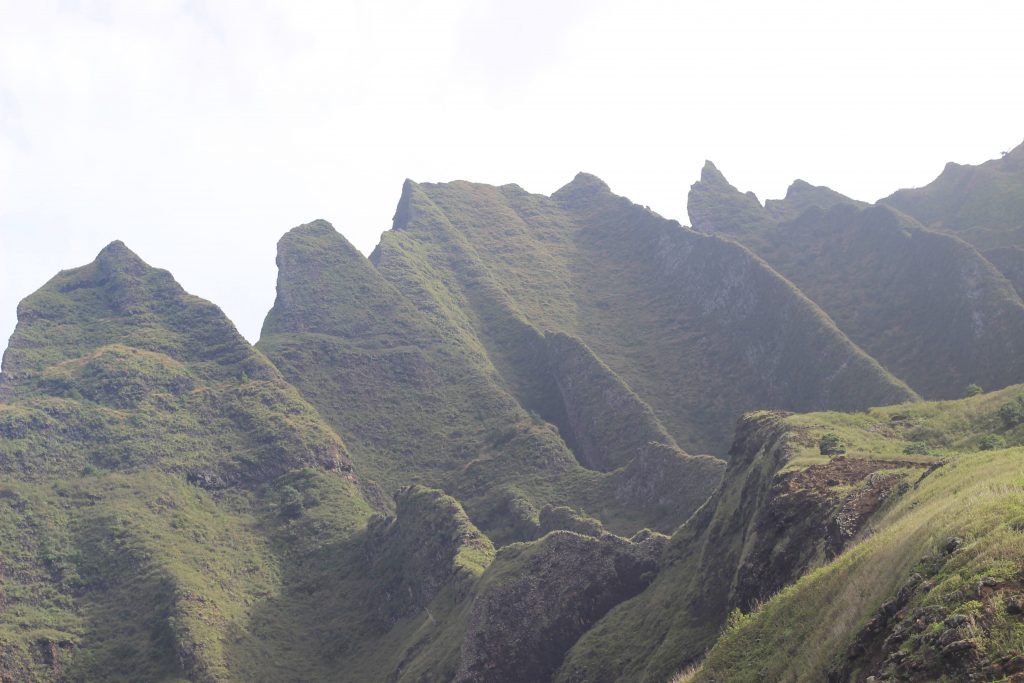
Last week my wife and I backpacked the 11 mile Kalalau Trail in Kauai. The Kalalau Trail is considered one of the top backpacking destinations in the world, and it lived up to its reputation for me. It was the most spectacular backpacking trip I’ve been on, with verdant jungles, jagged mountains, oceanside cliffs, waterfalls, rivers, creeks, and beautiful beaches. Not to mention passion fruit, whales, wild pigs, some big spiders, treacherous cliffs, and lots of mud.

Napali Coast sign

How to get to the Kalalau Trail

Two or three months before your trip, you need to purchase a permit to hike the Kalalau Trail. These can sell out pretty quickly, there are only 60 available per night (many people get them and don’t end up using them). They cost $20 per night. You can get a permit by going to the Napali Coast State Wilderness Park site. There’s also some information about the trail on the state parks site.

Warning Signs on the Kalalau Trail
Get ready for lots of warning signs

Before leaving for Hawaii, we packed our gear into two packs and put them all in a big duffel bag. I put the tent in my carry-on to save some weight.

We flew into Kauai on Wednesday at 4pm. We picked up a rental car and drove straight to Ace Hardware so we could pick up some butane (gas) for our backpacking stove. Gas canisters are not allowed on planes, so you’ll need to do the same. You can check the locations and hours of Ace Hardware online. I called the one in Lihue before we flew out to confirm that they carried butane (I heard that some of the other Ace’s on the island don’t carry it).

We next drove to Walmart to pick up some food, mosquito repellent, and a lighter. We had packed some of our meals, but needed some lunches and additional snacks. It was also good to pick up some stuff at Walmart for our whole stay so that we wouldn’t have to purchase bottled water, for example.

The Kalalau Trail is on the northwest corner of the island of Kauai. The closest decent size city is Princeville. We stayed in the cheapest place I could find for one night, an airbnb, which was still pretty expensive. If you’re up for it, there are lots of camping options around the island.

On Thursday morning we left early to give us the most time on the trail. It was easy to get up since we were from the mainland (3 hours ahead of Hawaii time) and since there were roosters crowing starting at 1:30am! Ugh!

We parked in the Hāʻena State Park parking lot. The cost is $15 per day (two nights = three days). I was a little worried about someone breaking into our car, so we didn’t leave anything valuable in there. At the very least I would make sure that anything you leave in the car is well hidden. This is a new parking option as of November 2019.

We lucked out with some fantastic sunny weather on Thursday. The Kalalau Trail is often closed due to rain. In fact, we were hiking on the 16th. From the 10th through half of the 14th the trail was closed! And as you’ll see below, the trail was closed again on the 17th. We lucked out by having scheduled our hike in a 2 1/2 day open window.

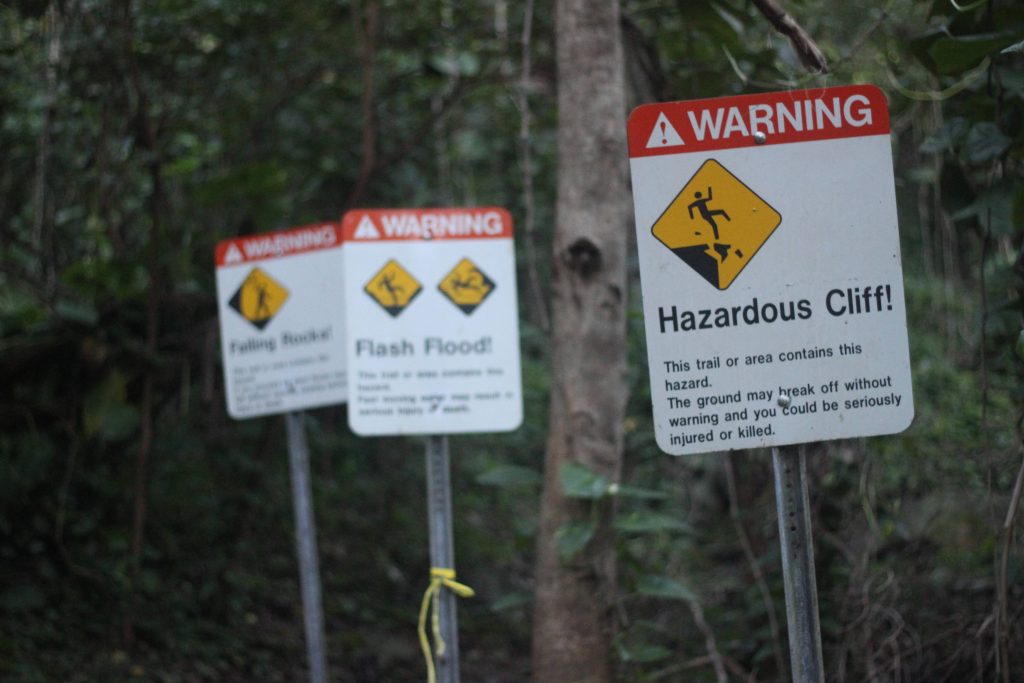
The reason the trail closes is that there are rivers that you need to pass that will become impassable with any steady rainfall. The rivers are actually the most dangerous part of the Kalalau Trail (not the cliffs).

How can you avoid closures? First, we were hiking in January, the middle of the winter. Winter in Kauai means more rain — about double the rainfall in the summer. You’ll maximize chances of an open trail by going in May through September. This site has a chart showing rainfall in Wainiha, right near the trail head.

Second, try to be flexible when you go. I know this is difficult since you need to get hotel reservations, but if you can alter your starting day by a day or two you may have a better chance of making it on the trail.

You can check the weather for the trail at this link.

You can check if the Kalalau Trail is open on the state parks website. If it’s not open, there will be a red alert at the top of the page.

Overview of the Kalalau Trail

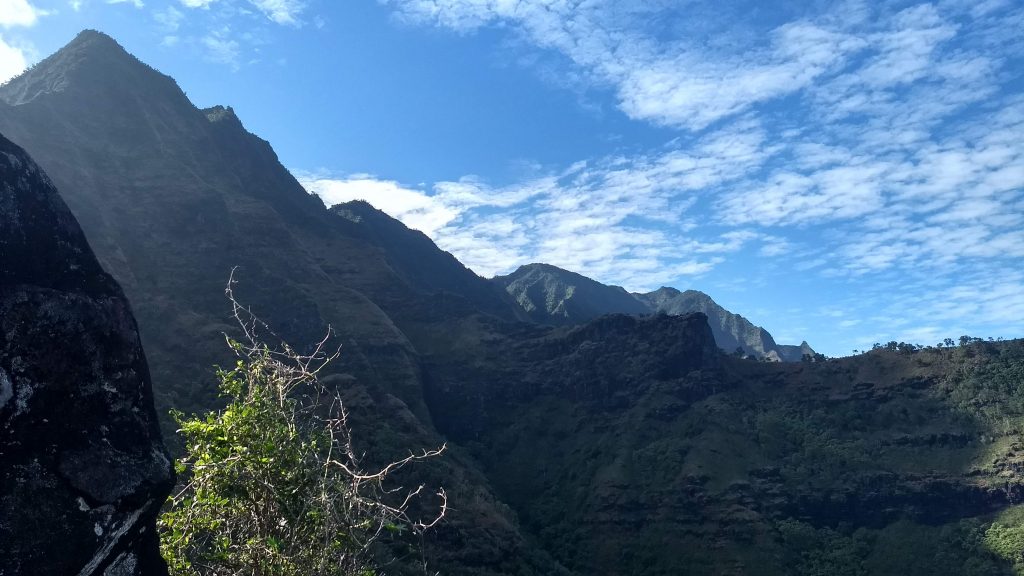
We started hiking right around 7:30. Once you’re at the actual trail head (something like 1/3 mile from the parking lot), the trail immediately starts climbing a steep hill. Not too far into the trail you’ll start getting some great views of the coastline.

Kalalau Beach is near the farthest coastal outcropping you can see

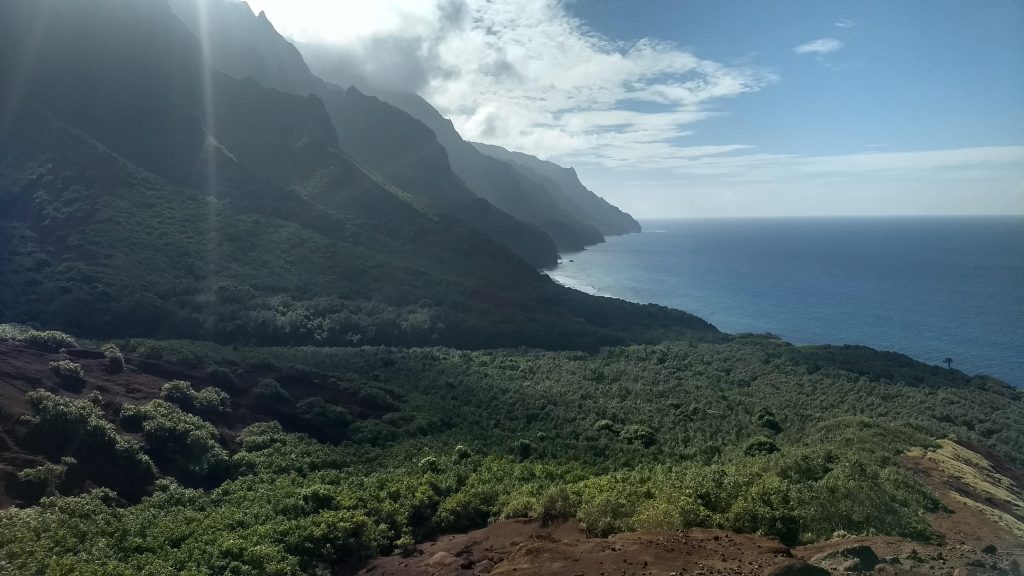
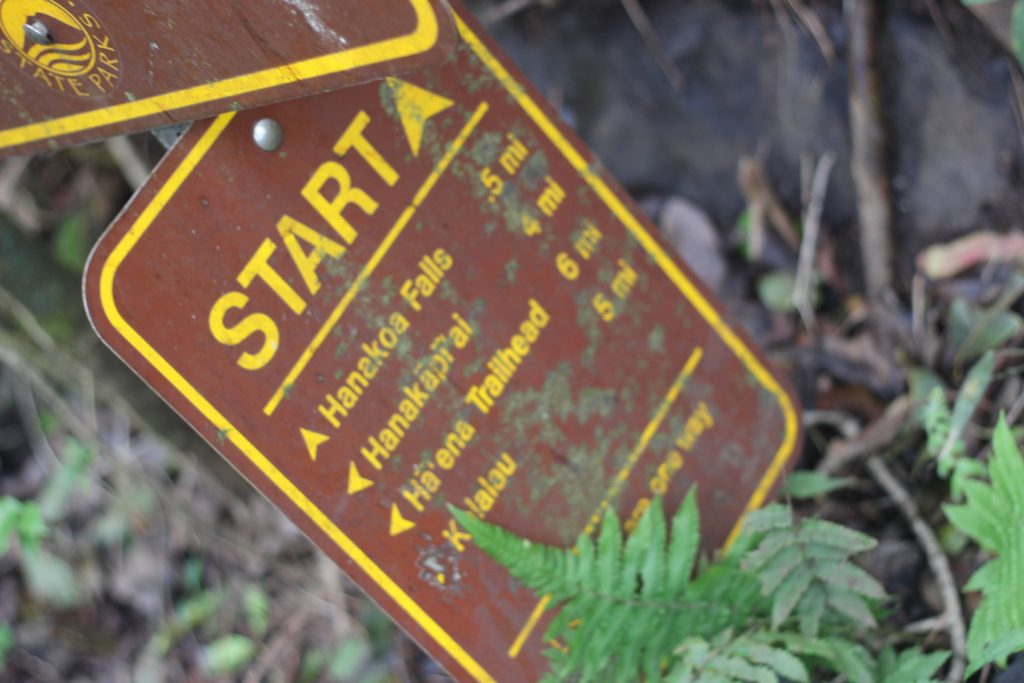
The Kalalau Trail is basically composed of 3 segments:

  • The first two miles from the trail head to Hanakapi’ai stream and beach. The Hanakapi’ai Waterfall is two miles from the beach up a different trail.
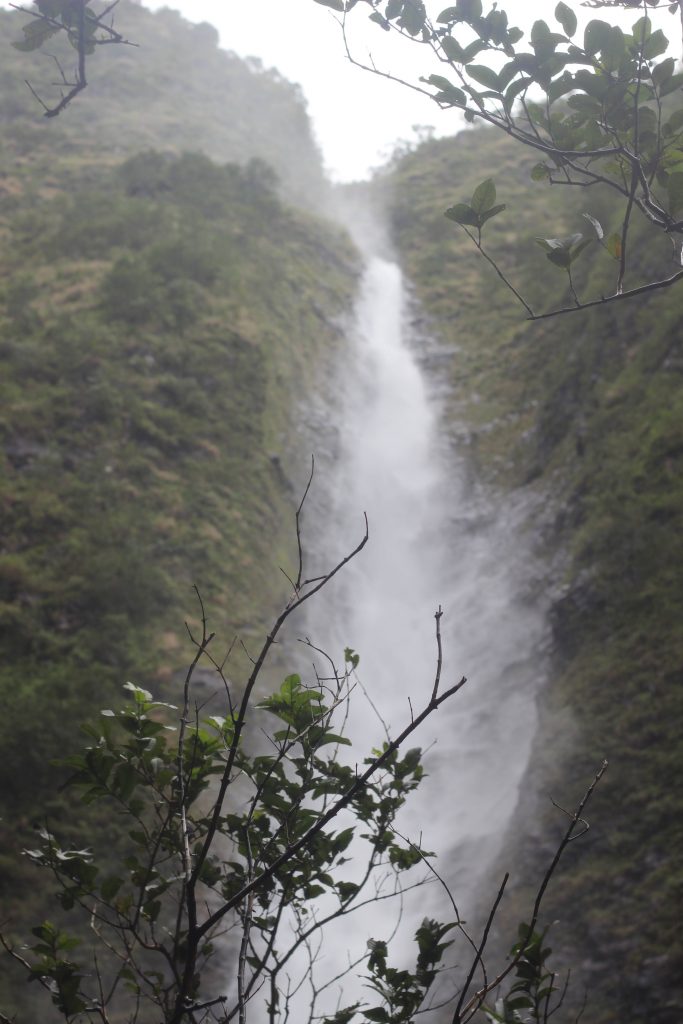
  • Mile 2 to mile 6 from Hanakapi’ai to Hanakoa Stream. You can camp in the Hanakoa valley, but there’s no beach access. The Hanakoa Waterfall is a mile from the camping spot on a trail up the valley.
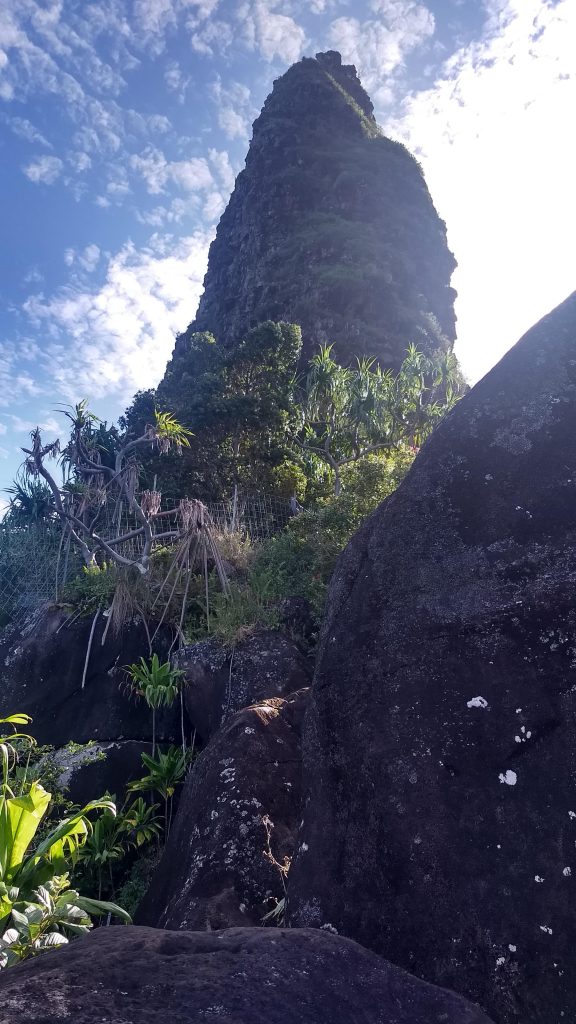
  • Miles 6 to mile 11 from Hanakoa Valley to Kalalau Beach. (At approximately mile 7 you’ll cross the infamous Crawler’s Ledge.)

Hiking the Kalalau Trail, Day 1

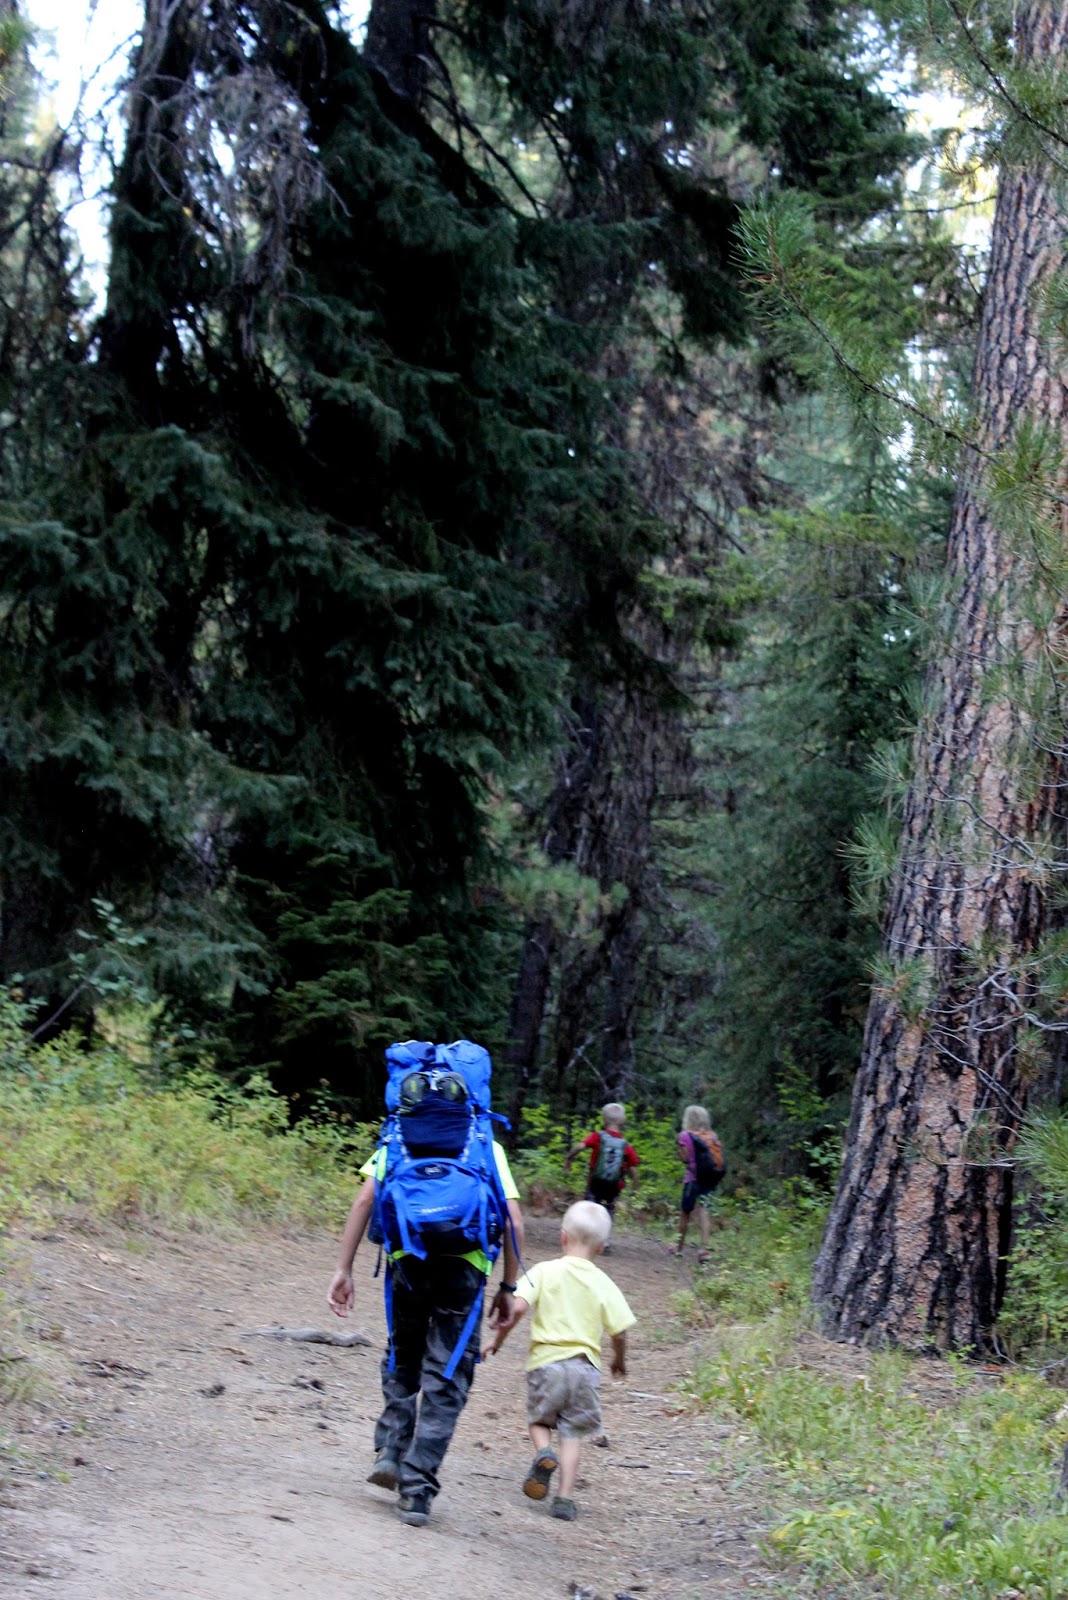
Since we were early there weren’t many people on the trail. All the people we did see on the trail in the first couple miles were just going the first couple miles to Hanakāpīʻai. That’s the first major stream crossing. From there the trail splits. People with permits can continue on the Kalalau Trail, but most people (without permits) either turn around or go to the Hanakāpīʻai waterfall, which is another two miles from the junction. That makes for a great day hike if you don’t have the time or desire to go all the way to Kalalau Beach.

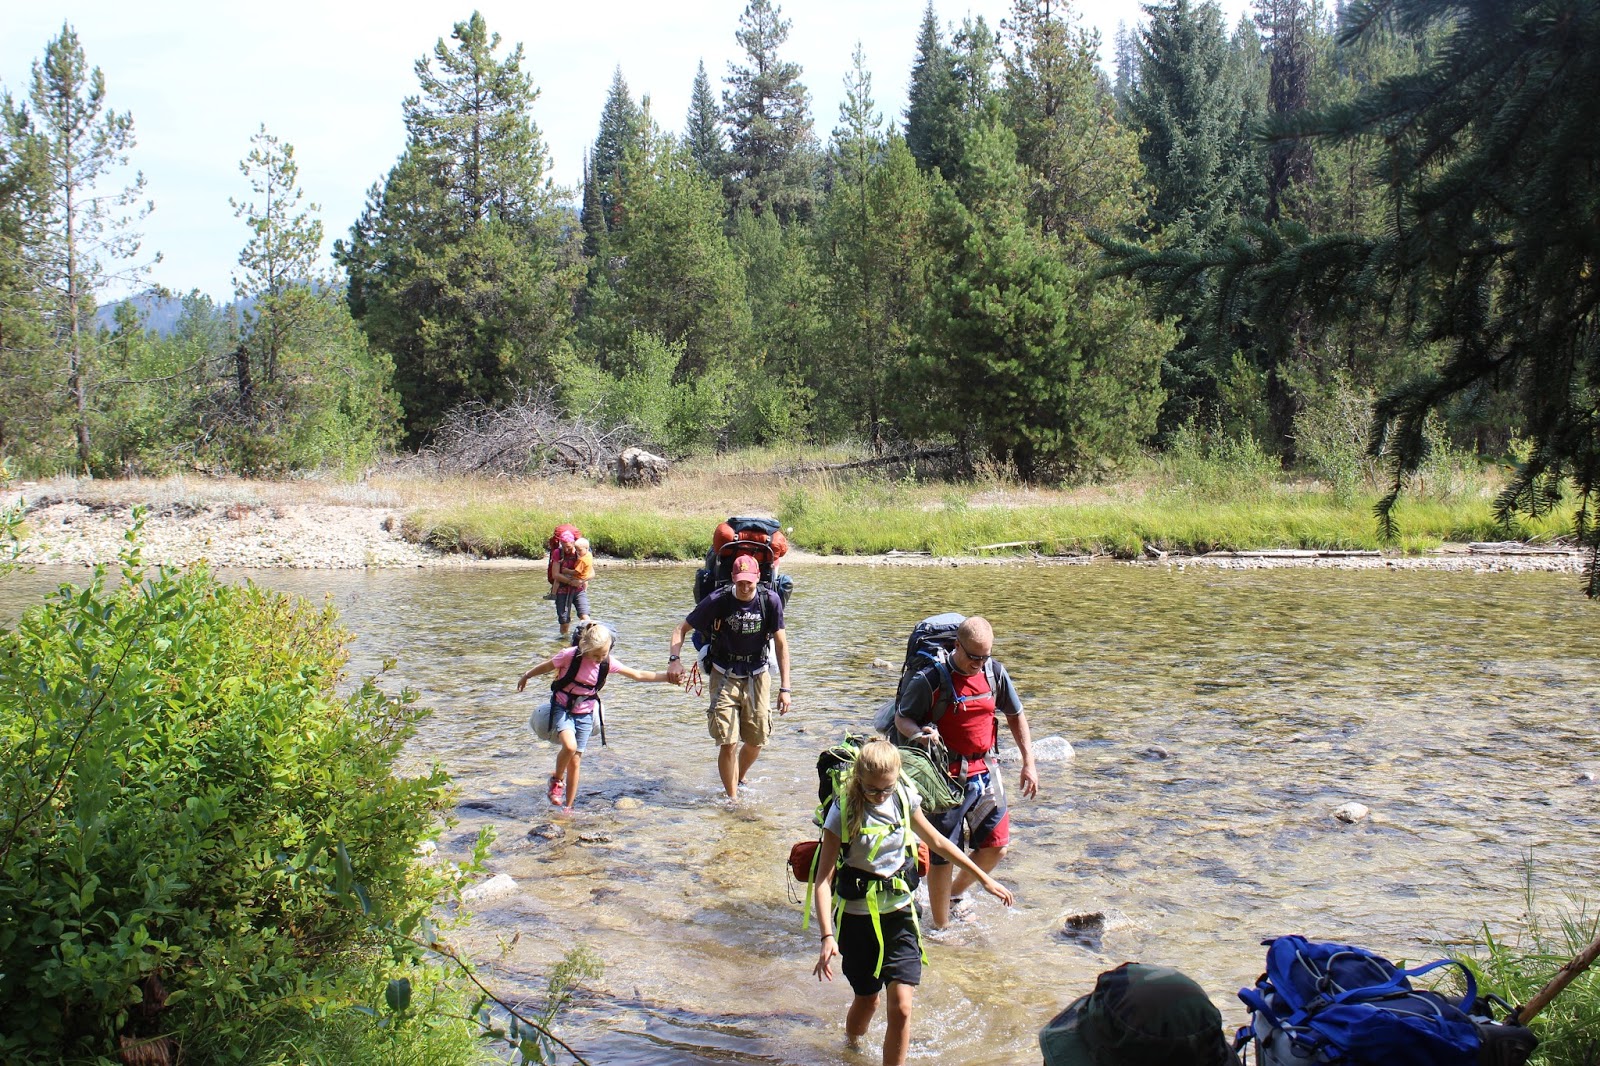
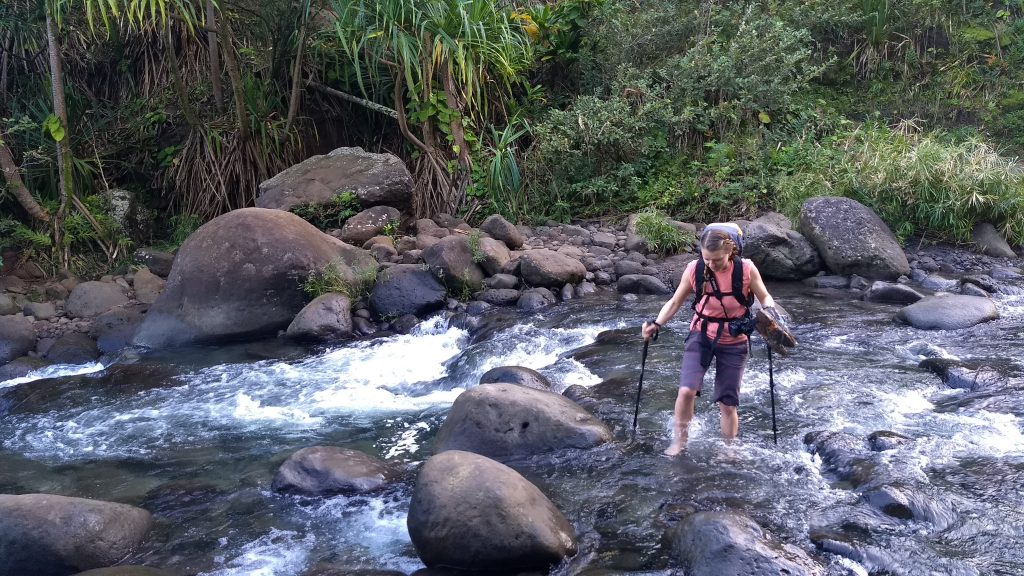
We took our shoes off to cross the stream as we were still mostly dry and didn’t want to hike in wet shoes all day.

Crossing Hanakapiai Stream on the Kalalau Trail

There’s a decent outhouse near Hanakāpīʻai Beach, in case you need it.

Kalalau Trail Outhouse

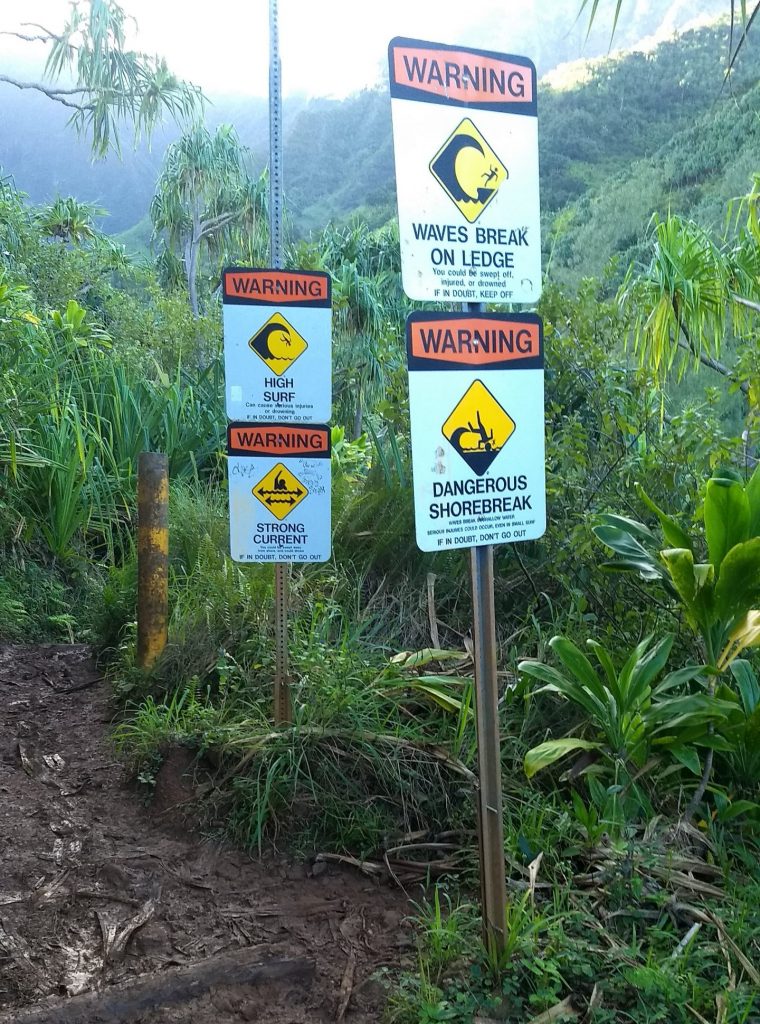
Be careful at Hanakapiai Beach! You probably shouldn’t swim in it. Here’s a story of a couple kids getting swept out. And another story and video of a rogue wave.

Warning signs at Hanakapiai Beach

We ate half our lunch at Hanakapi’ai and then started back on the trail.

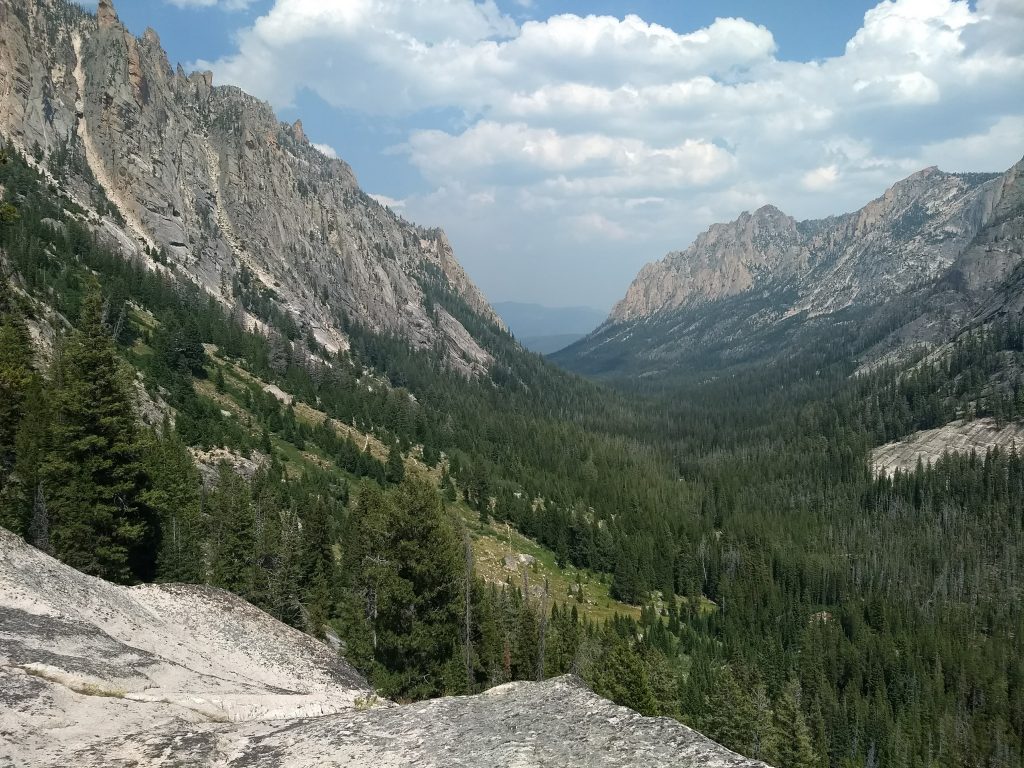
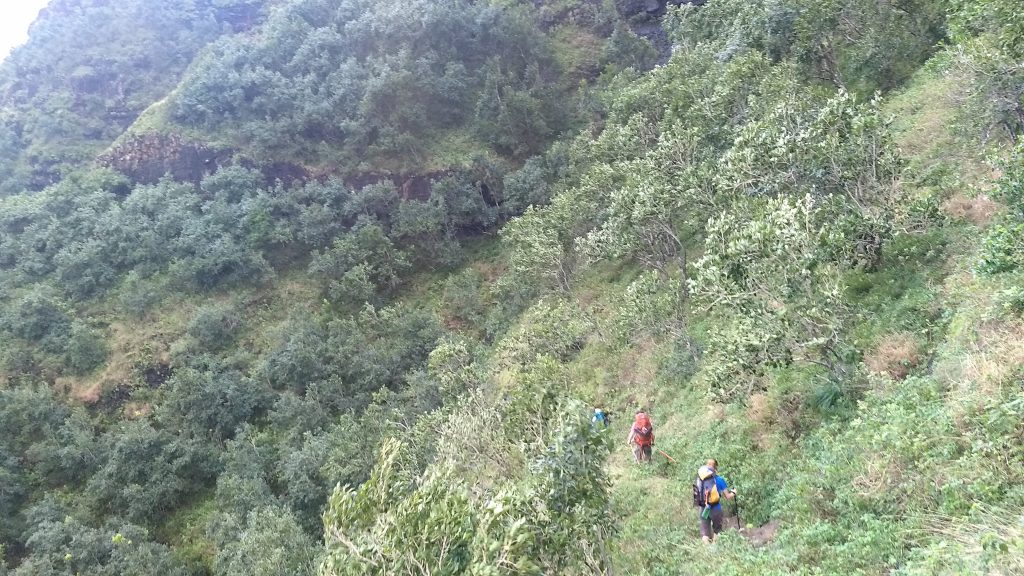
Throughout the morning I was continually amazed by the green jungle foliage. There was a variety of trees, bushes, and shrubs. There were flowers and many shades of green.

Hiking on the Kalalau Trail

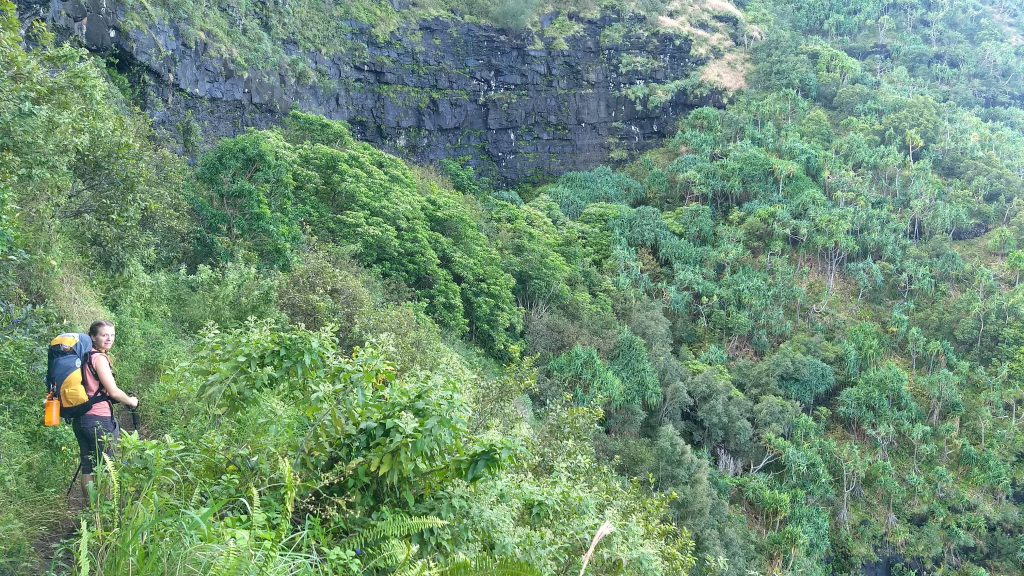
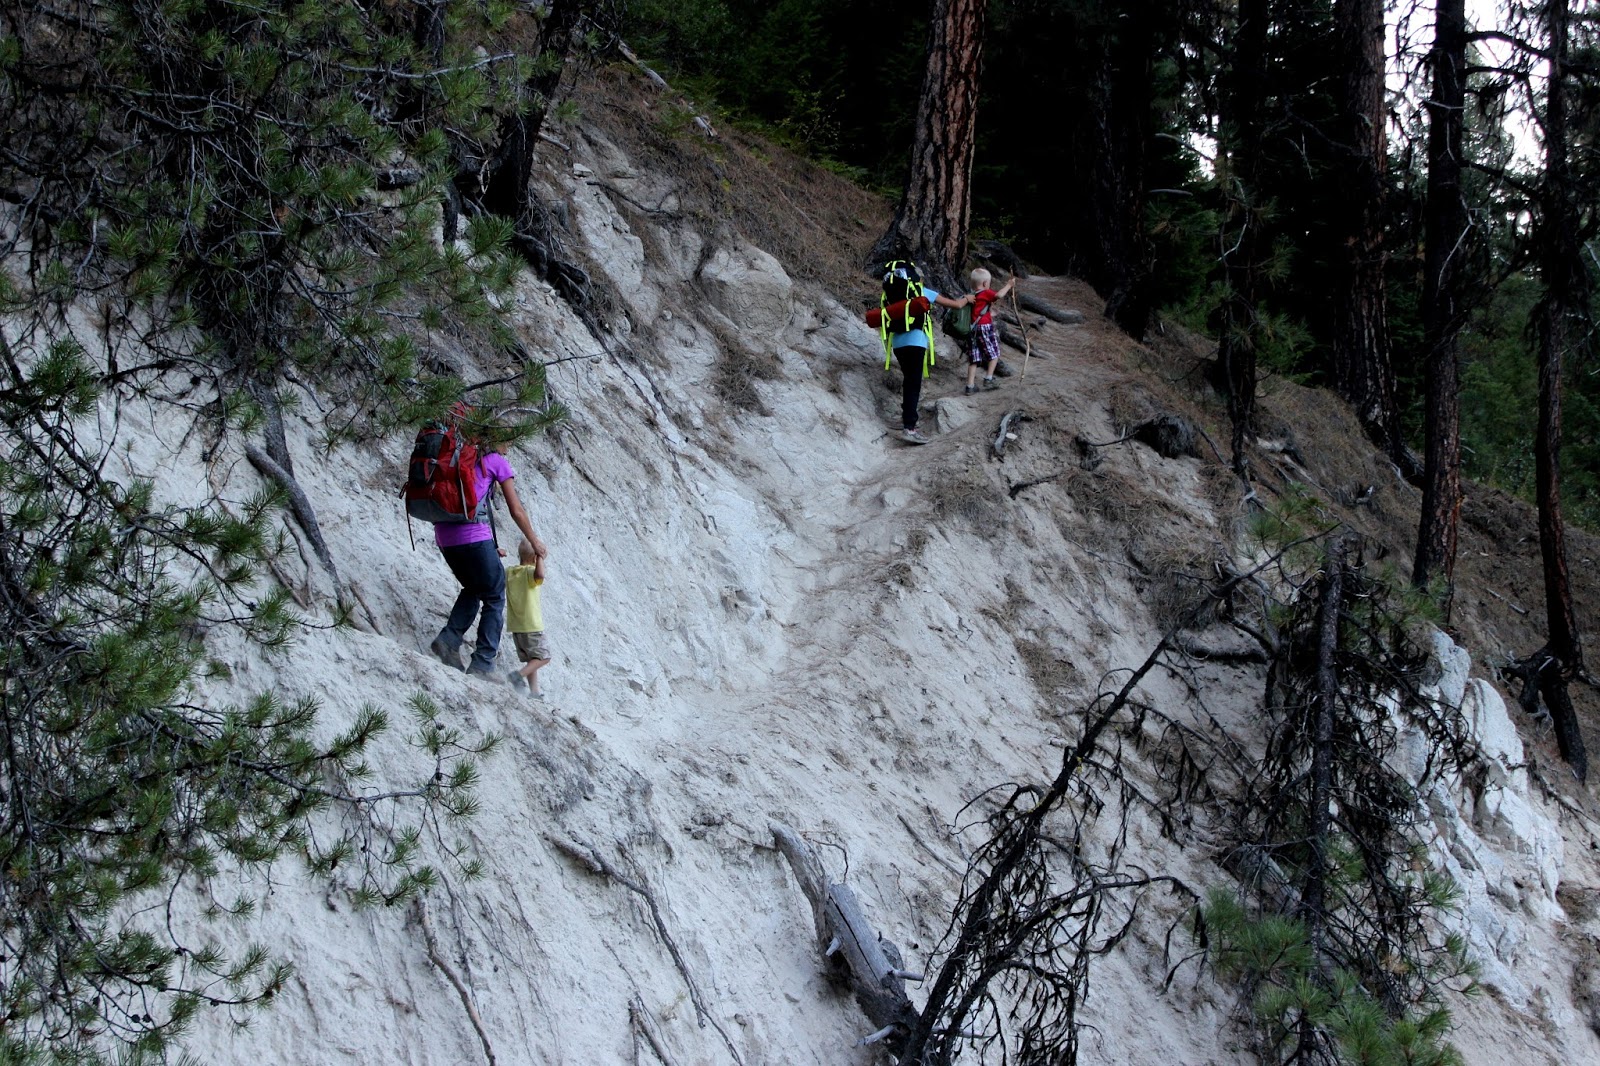
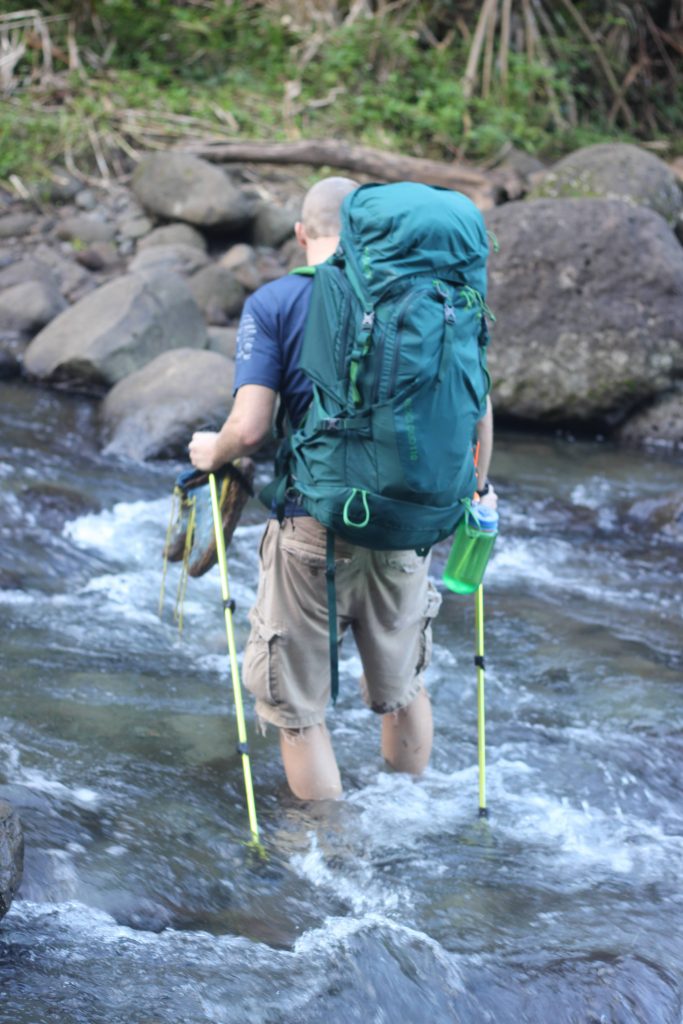
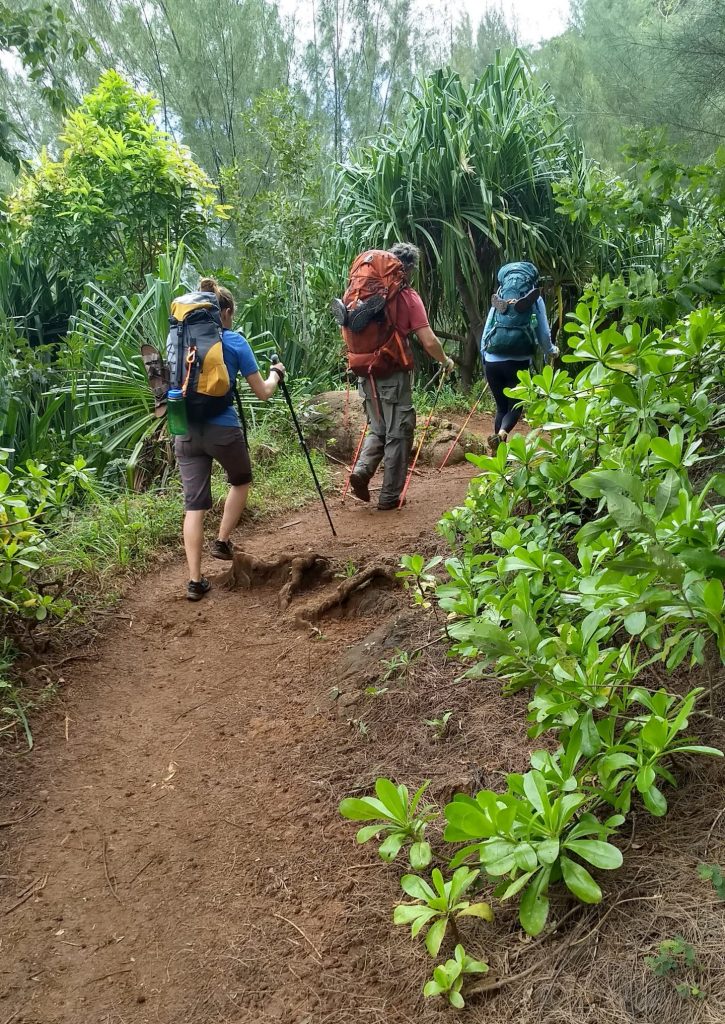
Small creeks crossed the trail in many places and there was mud everywhere, mostly due to the recent rains. The mud was enough to make our shoes and legs dirty, but not enough for us to get stuck in or to hamper our progress too much. I’ve done quite a bit of backpacking and I’ve never relied on hiking poles. Hiking poles may ease some of the pressure on your knees and legs, but they also cause you to expend more energy since you’re basically pumping weights the whole time. However, I purchased a pair of hiking poles for this trip and Cyndi borrowed a pair from a friend. We were very grateful we had them. They helped with the mud and with all the slopes and steps.

Rock Formation on the Kalalau Trail
One of many spectacular rock formations

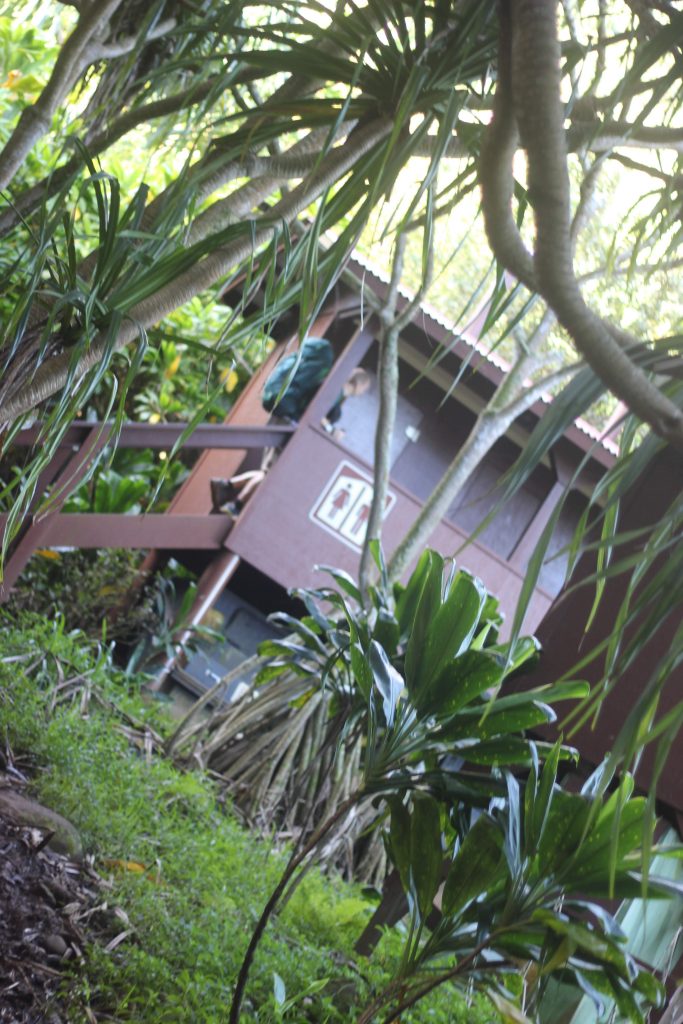
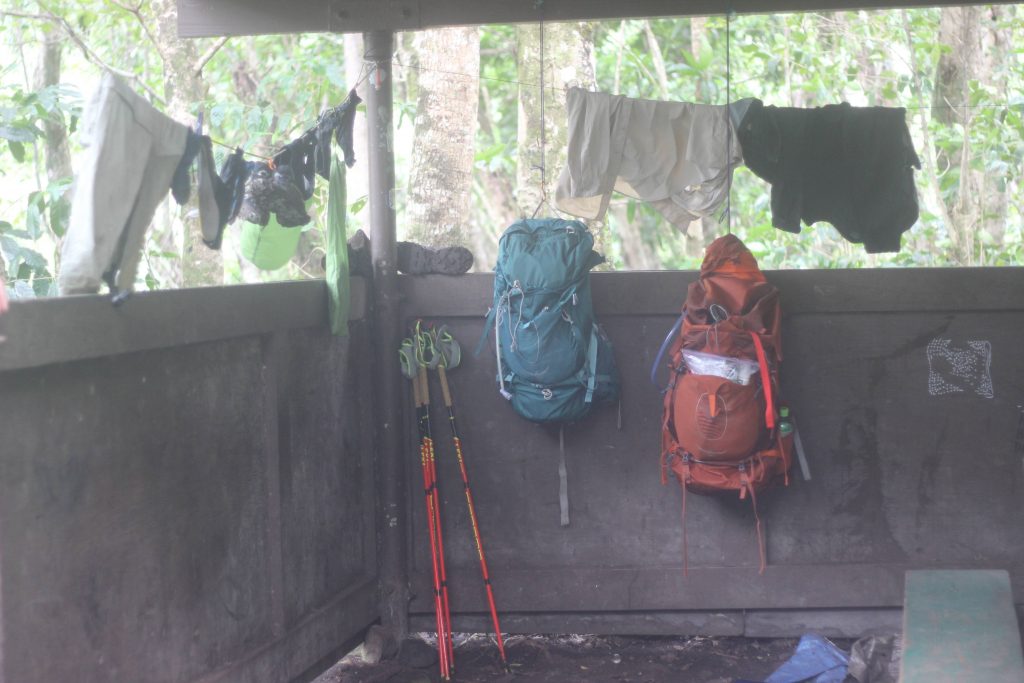
Eventually we made it to the beautiful Hanakoa valley where we had to cross another stream. There are some camping spots there and some were taken from people coming back. There is a little shelter with picnic tables on both sides of the creek, and an outhouse on the north side of the creek.

Hanakoa Mileage Sign

We had been hiking near a South Korean from Canada who was hiking solo. We saw him stop to take one of the lower camping spots. He planned on continuing on the Kalalau the following day. More on him later…

Kalalau Trail Mountains

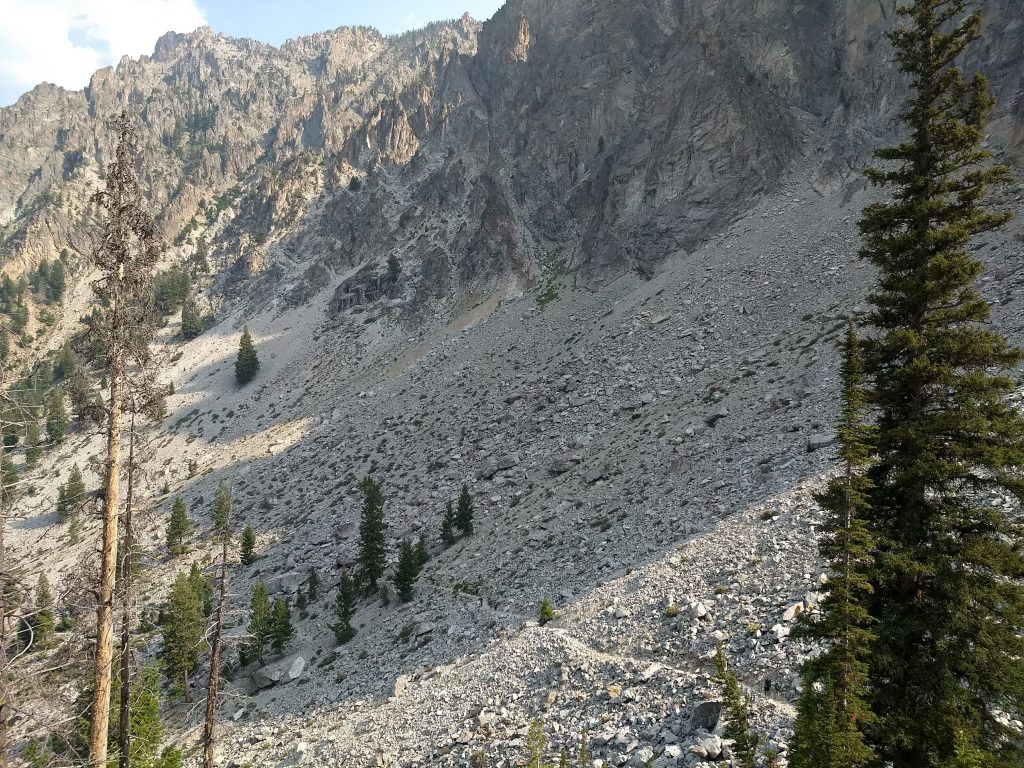
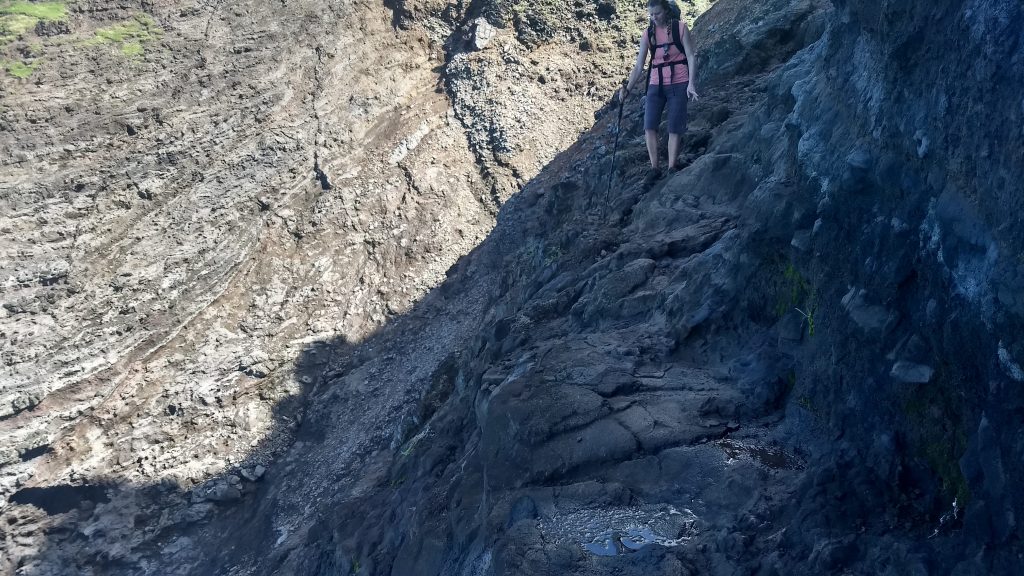
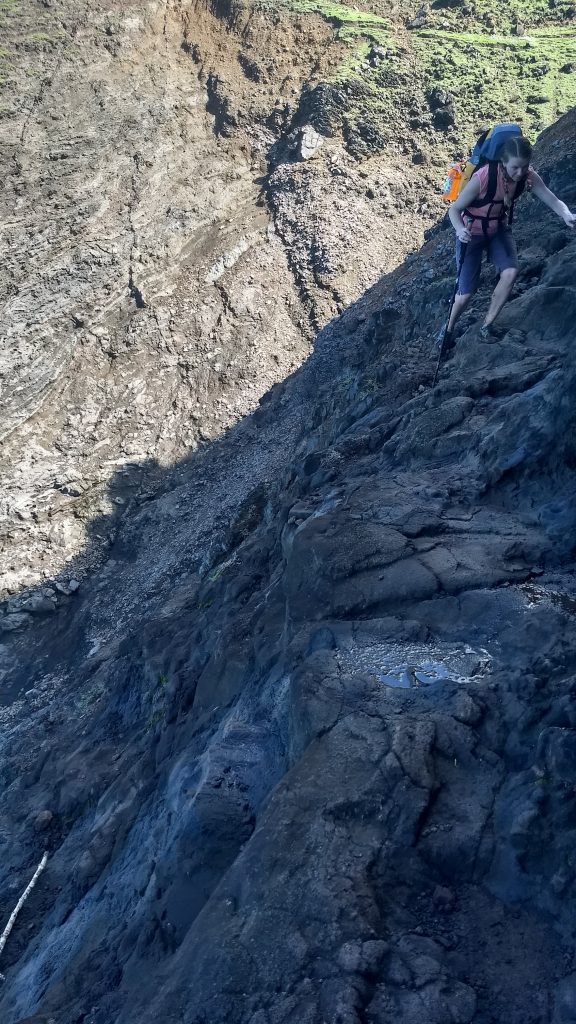
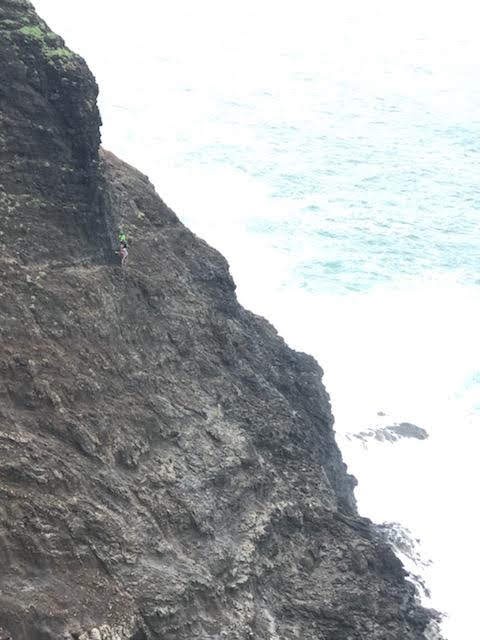
We continued on our way knowing that Crawler’s Ledge, the most famous part of the Kalalau Trail, was about a mile farther. (Cyndi was nervous about it.) We knew when we got to it. First you switchback down a grassy and rocky bank and then make your way around to the rocky cliff.

Warning before Crawler's Ledge on the Kalalau Trail

We took it easy on Crawler’s Ledge, but I really didn’t think it was too bad. Later, a friend said she was told that if you can walk across a sidewalk without falling over, then you’ll be fine. This is pretty accurate. Even if it was raining I don’t think I’d be too worried about it. In fact, there are other places on Kalalau Trail that are more dangerous, although they don’t feel as dangerous (if that’s any comfort).

Crawler's Ledge on the Kalalau Trail
Cyndi making her way across Crawler’s Ledge
Crawler's Ledge on the Kalalau Trail

With the sun shining, it was quite warm on parts of the trail. There was high humidity and not a lot of breeze on this particular day. Some spots felt like an oven as we walked through them.

Passion Fruit
We found some passion fruit on the trail, which I thoroughly enjoyed

At one point after Crawler’s ledge we stopped at another ocean overlook and ate another bagel. I was scanning the ocean hoping to see a whale and sure enough I spotted one a long way out from the coast. It must have been at least a mile, but I spotted it because it blew a big sprout of water! We were excited to see a few more sprouts. I’d never seen a whale before. A little later we also saw a herd of goats hanging out on a patch of dirt that sloped into the ocean.

Kalalau

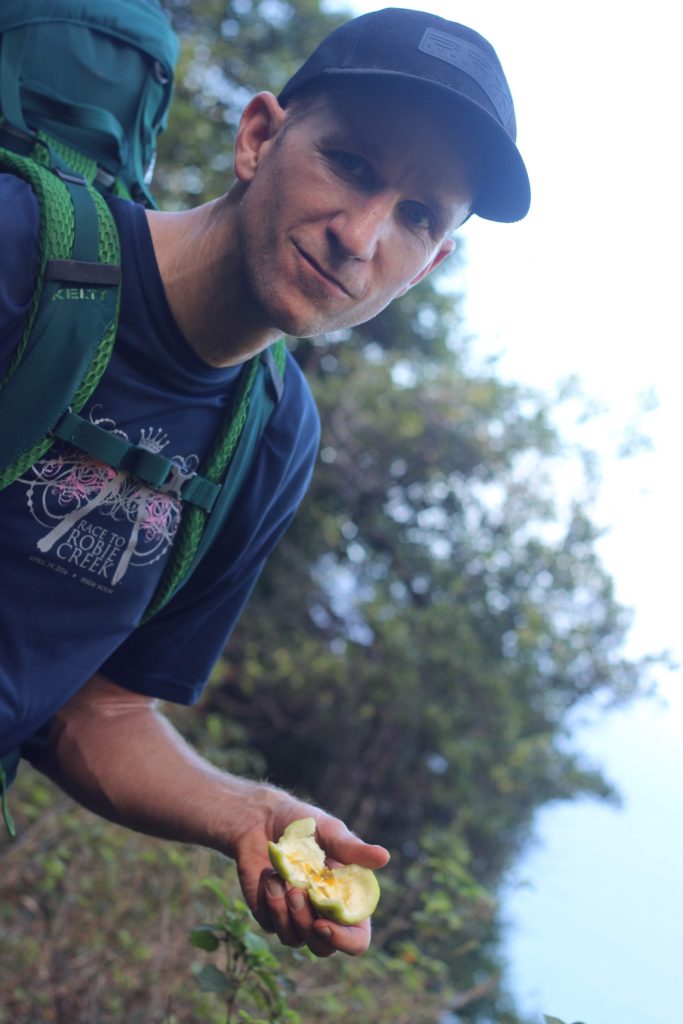
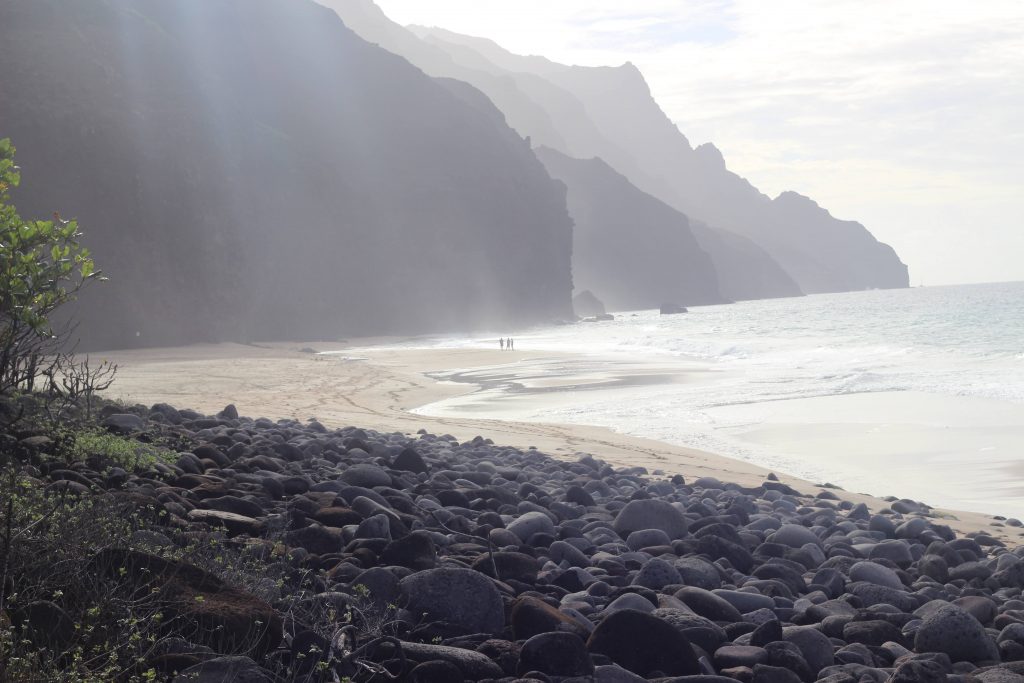
Eventually we rounded a turn and entered Kalalau Valley. We still had over a mile to go before our campsite. Approaching mile 10 we had to descend a long eroded stretch of trail that was pretty difficult on our tired legs. We were dragging after a long day of backpacking. We finally got to the bottom of that stretch and entered a large grove that had a bunch of passion fruit in it. That grove was bisected by the final big stream crossing, Kalalau Stream. This was probably the most difficult crossing, but it wasn’t too bad. I left my shoes on since they were filthy anyways and it made the footing much easier.

Kalalau Beach

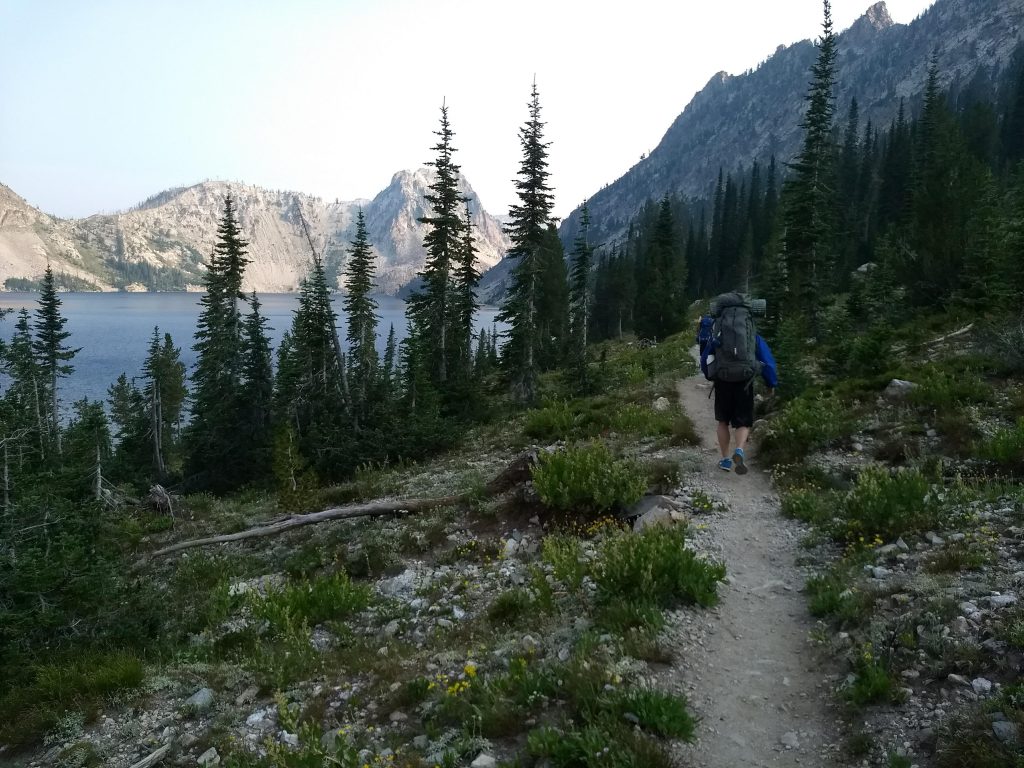
We were so happy to see the beach after another ~half mile down the trail! We quickly selected a spot to pitch our tent, and then threw on our swimsuits and headed down to the water. There is plenty of space to camp in the trees right along the trail. If you walk all the way to the end of the trail there are a couple overhangs and some premium spots to camp right next to the beach.

The beach is gorgeous. There is cliff on behind the beach and a waterfall coming down on the south side which disappears into the sand. The valley is composed of towering green mountains that seem to rise directly from the beach below. (We didn’t take the best photo, which is looking from the beach towards the mountains – there are plenty of these online though.)

Kalalau Beach

The sun was still out and it was nice to wash off all the dirt and sweat from the day’s hiking. The waves were really tame, so I actually did a little body surfing. This might have been unwise, but I was careful not to go very deep (only just over my waist). We walked along the beach to some cool caves carved into the cliff walls. There were probably 15 other campers in the area that night. Only one had passed us on the trail, so the rest had either camped at Hanakoa or had been at Kalalau Beach for more than one day.

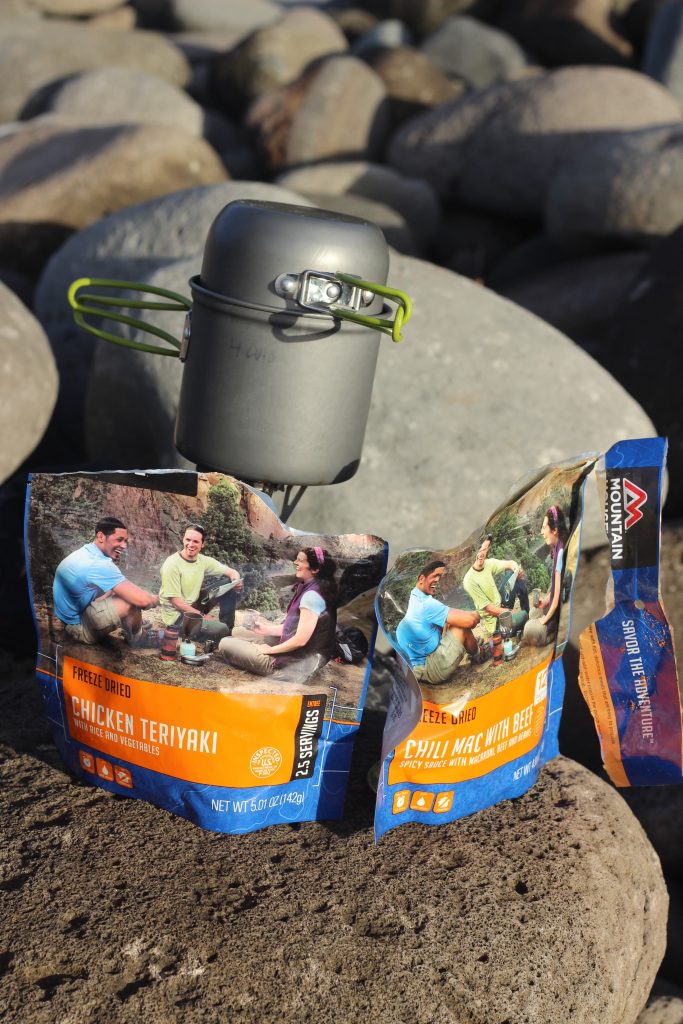
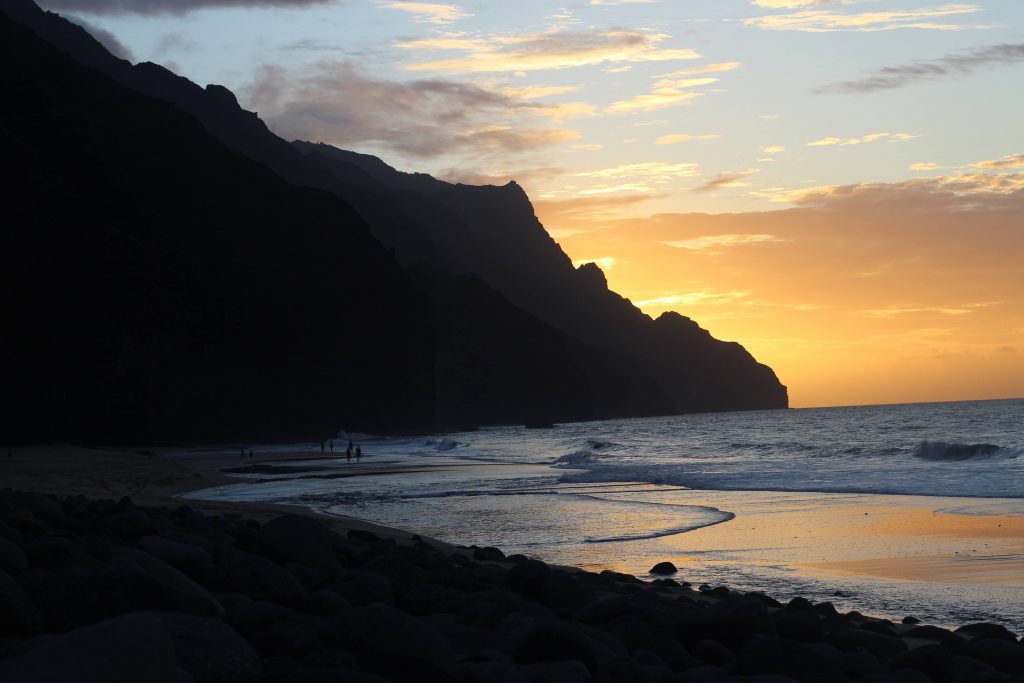
After a swim, we retrieved our stove and Mountain House meals and cooked dinner on the rocks by the sand as the sun went down behind the cliffs. We did a little reading and went to bed really early since it was dark, our home timezone was three hours ahead, we were exhausted, and we couldn’t have a fire. Some of our stuff was pretty wet from the hike so we just hung it on the trees.

Dinner on Kalalau Beach
Salty dinner tastes so good after a full day hiking!
Kalalau Beach at sunset

That night it RAINED! It must have started around midnight and then didn’t let up until about 10am. At one point during the night I found a little puddle of water next to me in the tent — the rain had dripped down the side of the tent and through a gap where the two zippers meet. I fixed it by moving the two zippers up. Luckily our tent was pretty waterproof otherwise. I had a small two-man tent, but before the trip I purchased a cheap three-man tent at Walmart to have enough space for our bags. Despite being cheap, it had a nice tarp floor and it held up very well. Thank goodness we had our bags in the tent and out of the rain. Since it was warm, any wetness that got into the tent really didn’t bug me a lot. I was actually hot most of the night as it doesn’t get below 60F in Kauai.

Hiking the Kalalau Trail, Days 2 and 3

When we finally got out of bed, the big concern was whether we’d be able to cross the stream to get out. We took our breakfast to one of the overhangs so we could get out of the rain at least. Streams of water were running down the trail. We met another couple who had the same concern and decided to hike out together to help each other cross the stream. Another couple ladies wanted help across as well.

Fortunately the rain had lifted early enough that the stream flow subsided. It was still much more water than the prior afternoon, but we carefully forded it with a couple of us anchoring in and then helping each other across.

We then had a very pleasant hike back to Hanakoa Valley. It was overcast with some wind, but it wasn’t raining and I hiked in shorts and a t-shirt again. The waves were enormous, contrasting the mild ocean just the day before. When we got to Crawler’s Ledge, the mist from the ocean waves battering the cliffs reached all the way up to us. Sometimes the waves would bounce off the cliffs and then crash into the waves behind them and spew water into the air.

Hikers on Crawlers Ledge on the Kalalau Trail
Can you see us coming back on Crawlers Ledge? Some hikers in front of us took this photo and sent it to us.
Jagged Mountains near the Kalalau Trail

The two ladies we crossed the stream with went ahead, but Cyndi and I hiked the whole way with the couple we met and we quickly became friends. We ended up camping in Hanakoa next to them and playing some card games that night, and then we hiked out the following day with them.

Drying Gear at Hanakoa
Drying off our clothes and gear after a wet night

We also made the mile hike to Hanakoa Falls, which was worth the hike. (There are some helpful orange tags on some trees to help guide the way.) I wish I’d jumped in the pool of water under the waterfall, but I was rather cold from a wet, windy day and from rinsing off in Hanakoa Stream.

Hanakoa Falls

We kept waiting to cross paths with the South Korean. We never saw him, and when we arrived at the camping spots we saw that his spot literally had a stream of water flowing through it. We felt really bad that he must have had a very wet night.

We woke up early in the morning to finish hiking out the Kalalau Trail. We had 6 miles to go and we were rather worn out.

Hiking on the Kalalau Trail

The trail was completely empty until we crossed Hanakapi’ai Stream. Evidently, the trail had been closed the day before due to the rain, which was no surprise to us. The last two miles was full of people making the day hike to Hanakapi’ai Falls.

We made it to our car by 11am after a very successful trip. Our car hadn’t been touched.

Backpacking the Kalalau Trail was truly the trip of a lifetime. It was so different to what I’m accustomed to, with lush vegetation, beautiful coastal views, steep green mountains, and moderate temperatures. It was the highlight of our stay on Kaua’i. I hope to do it again someday.

Trail Creek Lakes from Grandjean – July 2019

I’d been itching to do a backpacking trip this year. I was looking for a location I could take my kids — something challenging but not impossible for them. I also preferred something relatively close to Boise. I came across Trail Creek Lakes, which fit the bill with a 5.5 mile hike and a trailhead 2.5 hours from my house.

I took Friday off work and we headed out around noon after getting packed up. It was just me and four of my children, ages 12, 10, 8, and 6. I made sure we were prepared including a couple redundant items (like a second stove).

The nice thing about accessing the Sawtooth mountains from Grandjean is that it saves several miles and minutes off the drive. People camp around Grandjean, but there is also a trailhead with trails that head in a couple different directions. We were on the trail by 3pm and started a long trek up the mountain.

The trail is well maintained, but it has a few difficult parts. There were 5-6 significant creek crossings where we had to balance across logs to prevent getting wet. At least one of the crossings required finding walking sticks to help balance as the crossings were somewhat treacherous. It was July 19 when we hiked up, so much of the initial runoff had already passed through. Due to the creek crossings (and possible snow), I suspect this would be a much more difficult hike in June.

Taking a break on the trail

The only other big obstacle on the trail was a couple sections of downed trees. One area had obviously been hit by a heavy avalanche. There were full pine trees that were snapped in half and strewn all over the trail. Crossing these areas wouldn’t be a problem for most people, but when you have a 6-year-old it definitely slows things down.

We found some recently hatched birds on the trail

The trail has a significant, steady climb. I measured it at about 3,000 feet total. It started at 5200 feet and ended at 8200. I had to push the kids pretty hard to get up before dark. They did great. My 6-year-old basically only walks if someone is telling him a story, so between the way up and down I ended up rehearsing all the Hobbit, Lord of the Rings, and some Harry Potter books.

We arrived to the first Trail Creek Lake only to find that the ~4 or so camping spots were all taken. Unfortunately this meant we had to hike another half mile and 250 feet to get to the second lake. We had this lake all to ourselves which was pretty nice. I’m not sure there are any fish in it, but there are definitely fish in the lower lake.

Looking down on Trail Creek Lake #1

We had an enjoyable evening and hiked around the area in the morning before heading back down the mountain. It was a quick trip to get into the wilderness and give my kids another taste of backpacking.

Another of the Trail Creek Lakes

On the way home we also stopped by some hot springs that were right by the road and next to the river. I think they liked that more than hiking.

50 Mile Backpacking Trip in the Sawtooth Wilderness

I’m an adviser for a group of 16-18 year-old young men in The Church of Jesus Christ of Latter-day Saints. This means I help the group organize activities and generally mentor and guide them where possible. Every year we do a “high adventure” trip where we take a few days to do something outdoors that is memorable and character-building. Last year we went on a fantastic 50 mile canoe trip. This year we did a 50 55 mile backpacking trip through the Sawtooth Wilderness in 5 days. It was about what you’d expect: grueling, spectacular, and memorable.

Part of the reason I wanted to do this trip this year, was that we had a group of boys that I thought could handle it. It would challenge them, but we didn’t have anyone that couldn’t get it done, as far as I could tell. Another reason is that I have fond memories of hiking in these same mountains from when I was a youth. There are things you learn about yourself, others, and God on a trip like this in the mountains.

One limitation of the Sawtooths, and many similar areas, is a group size limit. The group size limit in the Sawtooth Wilderness Area is 12. I know people who have attempted to break this limit. Not only will this lead to fines, but I’ve come to appreciate the size limits as a way to protect these incredible areas. One group I know of was a couple miles into their hike when a ranger found them. Because their size was more than 12, the ranger turned them around and followed them out. Fines are common and are meted out regularly. Our group ended up including 6 youth and 3 adults. If you have a large group, please find somewhere else to go.

We debated the best course to take a group through the Sawtooth Wilderness. We considered some routes that would allow us to make a stop and transfer people in and out. We decided against this as it could easily lead to boys giving up and these routes weren’t optimal for what we wanted to see: lakes, peaks, empty spaces.

We decided to leave a car at Iron Creek Trailhead, then start the backpacking trip from Petit Lake. This enabled a point-to-point course.

Food

Fires aren’t allowed in some of the drainages, so we packed in small stoves and food that could be cooked on a stove. This was our meal plan:

DayBreakfastLunchDinner
MondaySack lunchHome-assembled minute rice and Freeze-dried chicken
TuesdayOatmealCrackers, cheese, & hamSoup & mashed potatoes
WednesdayOatmealBagel peanut butter honey sandwichMountain House
ThursdayBring your own
FridayOatmealLeftover snacksRamen
DessertsChips Ahoy, Oreos, Pudding (made in a ziplock from a box and powdered milk)
SnacksHot cocoa, cider, granola bars, raisins, craisins, Crystal Light, beef jerky, dried fruit

Day 1: Petit Lake to Toxaway Lake, 13mi & 4000 feet (including Snowyside Peak summit)

On Monday we loaded into the cars and set out at 6:30am from the Boise area. We started hiking from Petit at about 11am.

Petit Lake is very long, which is part of the reason we decided to go this direction. We didn’t want to end with the long straight-away next to the huge lake.

From the Petit Lake trail head, it’s about 6 miles to Alice Lake. Petit is at 7000 feet and Alice is at 8600, so there are plenty of switchbacks and a few creek crossings between the two lakes. During the hike there are some great views of the basin looking back towards Petit. We passed some other hikers during this part of the trip, including Buck, an acquaintance of mine. Many people do this segment as a day hike.

Hiking up the basin from Petit Lake

Alice is a beautiful lake, although we didn’t spend much time at it. It has some nice peaks and ridges to the south and west.

Alice Lake
Next to Alice Lake

We kept moving past Alice towards Twin Lakes. This required a little climb of 200 feet or so. Twin Lakes are much less popular, although they looked nice enough. We initially planned on camping at Twin Lakes, but everyone was feeling good. After a pow wow, we decided to push on to Toxaway Lake, our Plan B.

Blisters already – Above Twin Lakes

To get to Toxaway we needed to hike over a ridge at 9500 feet. This was a natural resting point to let everyone gather together again. It also presented a nice option to summit a mountain. Snowyside Peak towers over the ridge. It was as close to a peak as we’d get without going out of our way. After some discussion and debate, several of us decided to climb it. My rationale was that we were in good spirits and right next to the peak, so we should climb it now as we didn’t know what would happen during the rest of our trip that might prevent us from climbing other peaks.

Snowyside Peak
Snowyside Peak

Two of the boys had no desire to climb, so they forged ahead to secure a camping spot at Toxaway Lake. The rest of us made our way up, some faster than others. It took 1.5-2 hours to get up and back. A couple of the boys were much more deliberate about their steps and less experienced, so they took quite a while to get down. The views from the peak were spectacular (of course).

Snowyside Peak
Snowyside Peak

When we were finally all back down, we walked the final ~3 miles into Toxaway. We were exhausted by then. I took a dip in the cold lake to wash off and went to bed pretty early.

Excluding the peak, it was a 2500 foot elevation gain to the ridge and 1100 foot decline from the ridge to Toxaway Lake. We traversed 55 switchbacks (I counted). Snowyside Peak was about 1100 feet up and down from the ridge.

Day 2: Toxaway Lake to Hidden Lake

I woke up early to fish at Toxaway and the sun came up right in the dip between the mountains

During the night I woke up at one point and heard some huge boulders falling down the ridge on the opposite side of the lake. In the morning we woke up, ate breakfast, and then started heading up the ridge to the north. This was an arduous 2 mile, 900 foot climb to start the day with plenty of switchbacks.

The ridge above Toxaway

We took a break at the top, which offered some nice views, as well as a little patch of snow. We then made our way 800 feet down to Edna Lake. Another one of the adults and I actually dropped our packs and hit Rendezvous Lake on the way. We tried fishing it, but there were lots of frogs and no fish. I’m pretty sure it was too shallow.

We ate lunch and took a dip in Edna Lake, which is quite large and deep. Then we hiked past Vernon Lake without stopping much to take it in. After Vernon there is another little lake up a 300 foot climb. It has one nice camping spot which someone had taken. In fact, we passed a surprising number of people on this day when I thought we’d be pretty much alone.

We dropped another 600 feet to get to Ardeth Lake. Ardeth has a nice granite backdrop and is quite large. We were considering staying there for the night and taking it easy, but after a pow wow and some discussion, we determined to push on to Hidden Lake. This was no easy task, as it required yet another a 600 foot drop followed by a 1000 foot climb. We were all in pretty good spirits though, and we managed to stick together for much of those final 5 miles.

Hidden lake was a little gem at 8600 feet, nestled between two ridges. We made camp after a second day of 12+ miles, and once again some of us took a dip to clean up. We used a fire blanket to make a little fire and had a great spiritual discussion there in the mountains.

Day 3: Hidden Lake to Baron Lake

On the third day we awoke and started our climb to the west of The Temple and Mt. Cramer. Some of us were considering summiting Mt. Cramer, but due to our added mileage we decided it wasn’t worth the risk of wearing out or worse. It would have likely taken a couple hours and would have separated the group early on.

About to hike down into the Cramer Lakes area

Instead, we started the 6 miles downward in the direction of Redfish Lake. We passed Upper Cramer Lake, Middle Cramer Lake, and Lower Cramer Lake, as well as one other lake that wasn’t as visible from the trail. At one point, one of the boys got very worn out and slowed down considerably. We started getting worried and wondered if we should escort him out through Redfish. We forced him to eat, and after some time and some prayers he perked back up and we caught up with the whole group at the large creek crossing.

Some A-10’s happened to do a flyby through the basin near Redfish Lake – they were low and fast

From this point on I started having some memories of a 50 mile hike in the Sawtooths from my youth 20+ years ago. Part of our hike was from Baron to Redfish, so some points on the trail were etched in my fading memory.

When we left the creek, one of the boys took off about 100 yards ahead of me (I was still putting my pack on after a break). I immediately arrived at a fork and knew I was supposed to turn left. I couldn’t see the boy in either direction, so I sped up to ensure he was ahead of me. I kept speeding up but I didn’t see him. Luckily there were some switchbacks, so from a high switchback I called down to the others to go back for him. We sent one of the cross country runners, and about 10-15 minutes later they rejoined us. We were really glad we caught the lost boy that quickly! It cost him at least a half mile of hiking.

From the low point to the high point was a solid 1800 feet in 4 miles — a little less elevation than we had already hiked down. We passed Alpine Lake and some puddles. It was quite a climb, but we were rewarded with some great views, including “Heaven’s Gate” as we looked toward Redfish.

Heaven’s Gate leading down to Redfish Lake

From the summit it was 800 feet and 2 miles down switchbacks to get to Upper Baron Lake and then Lower Baron Lake. There was already a scout troop in the ideal spot at Lower Baron Lake, but we found a good spot downstream with nice water access. We played some games that evening and had a good time, although we were all beat after a 14 mile day. It was pretty fun for me to be at Baron Lake after a 21 year hiatus.

Day 4: Baron Lake to Sawtooth Lake

Getting from Baron Lake to Sawtooth Lake was pretty grueling and not particularly interesting.

We followed Baron Creek down 7 miles and 2600 feet to where the south fork and the north fork meet up.

Heading down the mountain from Baron Lakes. Can you see the hikers?

Where the creeks join up they form a roaring stream with some logs to cross on. I’ve heard that people have died here due to the high logs and rapid stream. We used the stream for water, but we didn’t need to cross since the trail forks back up toward our Sawtooth Lake destination.

This was another relatively uninteresting hike comprising 7 miles and a 2900 foot gain. There was a bit of brush and downed logs we had to work through, which slows things down. The trail leaves the bottom of the ravine and works its way up the side of a mountain, with occasional run-off streams crossing down. Eventually the trail takes a northward turn and closes the final distance to the large Sawtooth Lake.

There’s a really nice meadow on the south side of the lake that had enough room for us and another group. I slept under the stars that night and admired stars that can only be seen in the mountains on a clear night.

Day 5: Sawtooth Lake to Iron Creek Trailhead

We had now effectively cut a day out of our planned 6-day trip. Our last day was the shortest, a simple 6 mile and 2800 foot hike from the lake down to Iron Creek Trailhead. We passed Alpine lake on the way, but we didn’t bother stopping there as we had seen lots of lakes and we were all eager to get our packs off our backs.

Hiking out next to Sawtooth Lake

Switchbacks

Just for fun, I counted switchbacks each day as best I could. I used a pen, my hand, and a bunch of tally marks. This is what I counted (includes uphill and downhill switchbacks):

Monday55
Tuesday87
Wednesday109
Thursday61
Friday37
Counting switchbacks

50 Mile Backpacking Trip

I realized that 50 mile backpacking trips aren’t particularly “fun”, especially if they’re fast. I’m in really good shape (albeit running shape and not necessarily backpacking shape), but even so I went to bed exhausted every night. Some of the miles were quite difficult and I just had to trudge on.

However, 50 mile backpacking trips like this are spectacular and memorable. We saw countless mountain peaks and lakes. We pushed ourselves and suffered together. We had great conversations and bonded together. It was unforgettable. Someday I hope to do a trip like this with my family (all 6 of our kids). I know it won’t be easy, but it will be something they’ll never forget.

2016 Family Backpacking Trip to Some Hot Springs

We have some friends who have three children and enjoy camping and backpacking like we do. Early in the summer we set a date to take a little trip with our two families. The date finally came in late August and we set out: two couples and eight children to do a ~2 mile backpacking trip and camp out.

The place we selected was north of Crouch, ID. The Middle Fork of the Payette River flows down a ravine into Crouch, and there are several springs in the area. We were headed to some Hot Springs that were about two miles up a trail in a nice area where a creek flows into the Middle Fork.

We were a bit delayed getting out of town on a Friday afternoon, but after navigating traffic and driving about 23 miles on the road (mostly gravel) north of Crouch, we arrived at our destination.

Ready to get started at the trailhead
Ready to get started at the trail head; missing one adult

The trail we ended up taking was the Middlefork Trail.

Middlefork Trail Hot Springs Backpacking - Sign

The trail was pretty flat and followed the beautiful, meandering Middle Fork of the Payette River. There were some spots that were a bit difficult for the kids to navigate, but we got through them.

The trail was a little tricky at parts

Fortunately our friends’ children are a bit older and helped out with our little ones. This made the hike go by much more quickly and with minimal complaining from the kids.

The older kids helped the younger kids out

Even the baby was happy in her carrier.

Mom and baby on the trail

We arrived fairly late and immediately set up tents and made dinner. It was 9pm or so when we actually ate. The kids were troopers and fortunately we had raisins and fruit leather that helped hold them over.

Since we have a 15 month old, our family took two tents. I slept in the little tent with the baby so that she didn’t wake up everyone else as easily. She also tends to cry more if she sees her mom (as have all our children), so it was good to separate them. She ended up sleeping really well, all things considered. She awoke briefly at about 1am. Then she woke up at 5am, at which point I just put her in my sleeping bag with me and she slept until I got out of the tent at 7:30am or so. She then took some naps later on.

The other kids also slept really well.

Time to leave the warm tent in the morning

In the morning we ate oatmeal for breakfast and then put our swimsuits on and headed for the main attraction.

Testing out the hot springs

The hot springs tub was pretty awesome. It had some cement to make a quality tub. There was a pipe with super hot water coming in from the spring, and another with cold water coming in from the creek. The water flow was adjustable on both of the pipes. Then there was a big drainage pipe that could be unplugged to flush out all the water.

Crowded hot springs tub
A crowd in the hot springs tub

We spent a couple hours soaking in the tub and daring each other to jump in the creek.

The creek fed by multiple springs

We headed out before noon and took a parallel trail which required a couple river crossings, which were pretty fun.

Part of our crew crossing the Middle Fork of the Payette River

We got back to the car and made it home in time to catch a 4:30pm barbecue.

The fear with a trip like this is mainly the kids. Will they be able to hike without complaining too much? Will they sleep? Will they be safe? Kids almost always love camping, so we’ve found that as long as the parents are prepared, the kids will be just fine. That’s how it turned out this time. Our kids get regular outdoor play time and exercise so they were fine on the hike. We had sleeping arrangements that made for a fairly comfortable night for everyone. Just get them outdoors and things usually work out.

What a great trip!

White Clouds Backpacking Trip – 2016

Last week I did another great backpacking trip to Idaho’s White Cloud Mountains. I love the White Clouds and enjoyed the scenery, the challenge, and the chance to spend some time outdoors.

The route I took this year was similar to my backpacking trip to the White Cloud Mountains last year. However, this year I was with a big group of 20 people, including 14 scouts and 6 adults. This is the maximum group size allowed (as of August 2016), and I suspect that the limit will be reduced in the near future. The area was just protected as a Wilderness last year, which led to additional restrictions. My assumption is that more restrictions will go into effect with time.

White Clouds Backpacking Day 1

We left the valley at about 6:30am on Wednesday, August 10. Due to the Pioneer Fire, the road between Banks and Loman was closed, so we took Highway 21 through Idaho City, Loman, and then on to Stanley. We saw the destruction from the Pioneer Fire between Idaho City and Loman. In fact, there was still smoke everywhere and we saw a few burning logs and brush fires.

We arrived at the 4th of July Trailhead and started hiking around 11:30am. Everyone was carrying their food for 4 days, so packs were a bit heavy that first day. It also seems to take a day to get broken in for a good backpacking trip.

White Cloud Mountains - Sign to Born Lakes

We made our way from the trailhead to 4th of July Lake, but besides a short break to let everyone in the group catch up, we didn’t really spend any time at the lake. The climb to the lake is pretty good, and then the trail continues on to Born Lakes with another significant climb to the top of the ridge. The total climb is around 1200 feet. We spent some time on the ridge taking pictures and hiking to a small peak. I also pointed out Devil’s Staircase to the group, which we would be climbing the next day.

Antz Basin where Born Lakes are located. This view is from the ridge between Antz Basin and 4th of July Lake. You can see Devil's Staircase as a cut in the far ridge that angles up and to the right.
Antz Basin where Born Lakes are located. This view is from the ridge between Antz Basin and 4th of July Lake. You can see Devil’s Staircase as a cut in the lowest point of the far ridge that angles up and to the right.

We then descended down the ridge on the switchbacks and made our way to one of the farther Born Lakes.

Switchbacks into Antz Basin

The Born Lakes are a set of 7-9 lakes nestled in Antz Basin. There are a couple big lakes and the rest are pretty small. The first decent sized lake is about 4 miles from the trailhead and the other bigger lake is about 5 miles. We came across a gentleman who didn’t want us there and said there wasn’t room for all of us at the lake we were headed to. He wanted us to hike down Antz Basin and find another spot. We said we’d check it out, and there was plenty of room for us (as I knew since I’d been here twice before). He also said he came there every year. Interesting how some people want to be the only ones to enjoy beautiful areas such as this. They want to come every year, but find it hard to share with others. I understand that most people don’t want to see other people in the back country, but it’s public land and everyone has a right to it. I’m grateful that my scout leaders introduced me to the White Clouds and Sawtooths and outdoors in general, and the benefits that our scouts got from this trip would stay with them forever.

Hiking in Antz Basin toward Born Lakes

Right after arriving at the lake I started working on catching my first fish. I caught a nice one pretty quickly, which left me satisfied so that I could set up the tent. Some of us also jumped in the lake to rinse off after the 5 mile hike.

First fish I caught on the trip!

After we had set up camp, a ranger came through and made sure our group size was within the limit. He was pretty nice and gave us some instruction on how to properly Leave No Trace. We had reviewed this with the scouts but it was good to go through it again with the ranger.

I didn’t sleep great that night. I was a bit too cold, and I never sleep well camping anyways. I should have worn an extra shirt and some extra socks.

White Clouds Backpacking Day 2 – Born Lakes to Boulder Chain Lakes

After breakfast on Thursday morning we got ready to ascend Devil’s Staircase. Devil’s Staircase is part of the shale ridge located to the north east of Born Lakes. It’s one of two popular ways to pass the ridge without going all the way around on the trail. The other popular way to get over the ridge is by going east from Born Lakes then crossing over the ridge to the south, leading into Four Lakes Basin.

Devil’s Staircase sounds and looks pretty nasty, but it’s really not too terrible. I’ve done it three times now — twice with a full (~50 lb) pack on my back. Still, it has a lot of loose shale and boulders. Since we had a large group, we spread out and attacked the pass about six people at a time spaced a few minutes apart. This worked out pretty well. It helps that Devil’s Staircase is angled up the ridge, so if you’re spread out you won’t be directly above/below other climbers.

Ascending Devil's Staircase in the White Cloud Mountains
Ascending Devil’s Staircase in the White Cloud Mountains

Fortunately for our group, we all made it safely up the ridge and down. One of our 14-year-old scouts got pretty scared at one point, but he was able to finish after taking a break and calming himself down.

Descending Devil's Staircase toward Shallow Lake and Windy Devil
Descending Devil’s Staircase toward Shallow Lake and Windy Devil

Shallow Lake, Scree Lake, and Noisy Lake

From the top of Devil’s Staircase, we headed down the other side toward Windy Devil. Some of us dropped our packs and hiked down to check out Shallow and Scree Lakes. Eventually we all made our way around the top of the basin to Windy Devil. At the top of Windy Devil there’s a nice trail which switchbacks down the shale face and leads into the Boulder Chain Lakes basin. (The trail starts right at the top of Windy Devil.)

My selfie on top of Windy Devil pass with Scoop Lake in the background
My goofy selfie on top of Windy Devil pass with Scoop Lake in the background

Part of our group descending Windy Devil in the White Cloud Mountains. Headwall Lake and Scoop Lake can be seen in the background.
Part of our group descending Windy Devil in the White Cloud Mountains. Headwall Lake, Scoop Lake, and part of Hummock Lake can be seen in the background.

From Windy Devil there are some nice views of Headwall, Scoop, and Hummock Lakes — some of the upper Boulder Chain Lakes. We were pretty spread out by the time we started arriving at Scoop Lake, so we took a long break there. Some of us decided to check out Lonesome Lake and took a quick side trip up the granite ridge. The views from Lonesome Lake are spectacular and I highly recommend the trip.

Eventually we started to head down toward the lower Boulder Chain Lakes.

Hiking past Hummock Lake in the White Cloud Mountains

We fished and took some breaks, but finally decided on camping at Willow Lake at the bottom of the Boulder Chain.

Willow Lake seemed really cold, but it was worth taking another dip to clean up before bed time.

White Clouds Backpacking Day 3 – Boulder Chain Lakes to Chamberlain Basin

On Day 3 we were ready for a long slog to Chamberlain Basin. Our group set off with high hopes and expectations, but after a couple miles the climb started and some of our boys were bogged down as they made their way up the mountain.

White Cloud Mountains - Hiking from the Boulder Chain Lakes
Heading out from the lower Boulder Chain Lakes

The trail takes backpackers through a lot of forested areas and some meadows. After a mile or so we were graced with an amazing view of Castle Peak.

We got some great views of Castle Peak as we hiked the trail from the Boulder Chain Lakes to Chamberlain Basin
We got some great views of Castle Peak as we hiked the trail from the Boulder Chain Lakes to Chamberlain Basin. We eventually crossed the ridge to the left of Castle Peak (the spot covered by the tree).

This is when I realized that the ridge just to the southeast of Castle Peak was the one we would be crossing. It was pretty far up. There’s a large creek crossing and then the uphill begins. Initially the uphill is all in the forest. I don’t like this part very much because I can’t see where I’m going.

A view from the trail on our way to Chamberlain Basin

Fortunately there were lots of currants (or gooseberries?) on the side of the trail which kept me distracted. Currants don’t really taste great, but they’re alright and it was a welcome challenge to try to find the ripest berries.

Eventually the trail hits switchbacks up the side of the ridge. However, before starting up the switchbacks, another one of the adults and I decided to take a side trip to Castle Lake. We were in the back of the group, so we didn’t get the chance to talk anyone else into coming with us.

We had our eye on the spot where we would approach Castle Lake, but we weren’t sure if it would work once we got there. Looking at Castle Lake from the trail we were at, we were hoping we could approach it from our left. There are some cliffs with a shale face above it that we hoped we could traverse. We dropped our packs, grabbed our fishing gear, water, and some snacks, and headed for the lake. To our delight, we discovered a trail right in the spot we were aiming for that traversed the shale area. Even though there was a trail, it was a little freaky. If I looked down when we were above the cliffs I actually got some vertigo — I think due to the crazy angles and drop-offs.

The freaky trail around the spur of the mountain to Castle Lake. The trail really wasn't too bad. Just don't look down.
The freaky trail around the spur of the mountain to Castle Lake. The trail really wasn’t too bad. Just don’t look down.

Return trip from Castle Lake

The trail took us right to Castle Lake, and we hardly changed elevation from where we dropped our packs. It was a pleasant surprise as we expected a challenging climb. Castle Lake is beautiful. Nestled between Castle Peak and Merriam Peak, two thirds of the lake is surrounded by mountains with the remainder opening up to the basin below.

Michael and I at Castle Lake in the White Cloud Mountains

Castle Lake Panorama
Castle Lake Panorama – doesn’t do it justice

After an enjoyable time at Castle Lake, we headed back out to the main trail. We worked our way up Castle Divide and then down the other side into Chamberlain Basin, where we finally met up with the rest of our group.

A panorama from Castle Divide in the White Cloud Mountains
A 360 degree panorama from Castle Divide in the White Cloud Mountains

The southeast side of Castle Peak from Castle Divide
The southeast side of Castle Peak from Castle Divide. You can see some of the trail we hiked up on the right.

Castle Peak from the southeast

Actually, just as we arrived at the first big Chamberlain Lake, we were met by another ranger and a film crew. They were filming for Outdoor Idaho, a PBS series. They interviewed me and my hiking partner and got some footage of the ranger telling us about Leave No Trace principles.

As we wrapped up with the film crew, a few of the guys from my group arrived from camp in their running clothes. They had ran each day of our trip, and thus far I hadn’t gone with them since I was still trying to recover from the Morgan Valley Marathon and the XC12K. However, I was feeling up to it at this time and I wanted to see the upper lakes anyways, so I asked them to wait for five minutes while I headed for the brush to change into my running shorts and drop my pack.

The run was amazing (unfortunately I don’t have a GPS track of it). We saw all the upper Chamberlain lakes and headed all the way to the bottom of the ridge at the top of the basin. It brought back memories as I had once been to one of the upper lakes when I was a teenager (we came over the ridge from Washington Lake but didn’t go far down the basin). It was nice to get a little run in and felt much different on my legs than all the backpacking. I was quite sore as we ran back down towards camp, but it was worth it and felt wonderful.

It was also nice to warm up right before jumping in the lake.

I really enjoyed dinner that night — mashed potatoes and soup. I slept ok.

White Clouds Backpacking Day 4 – Chamberlain Basin Past Washington Lake and Back to 4th of July Trail Head

Our plan for Saturday was to wake up a little extra early and head out in small groups to give the slower hikers a bit of a head start.

The first group of 6 or so headed out at 7:30. I was in the next group at 7:45. The last group left at 8:00.

The hike starts with a gentle incline and passes one of the nastiest looking lakes I saw on our trip — a small lake with no outlet and no apparent inlet. After that lake we got a nice view of the ridge we would have to surmount. It was warming up so we changed into cooler clothes and headed up. At the bottom we saw the group ahead of us, and at the top we saw the group behind us.

Castle Peak from Chamberlain Divide

As usual, there were some awesome views at the top of the ridge and we snapped some photos before descending down the other side. There was some nice downhill (much of which we jogged) and then a gradual uphill to Washington Lake. I really wanted to do a little excursion to the small lake southwest of Washington Lake, but I didn’t have anyone to go with me and I didn’t want to keep the others waiting.

Hiking towards Washington Lake from Chamberlain Lakes

Washington Lake
Washington Lake

Our whole group met up at 4th of July Lake and we snapped some group photos. Finally we headed down the last stretch of trail to get back to our cars.

Hiking our last stretch out of 4th of July Lake to the trail head

What I Ate During the Backpacking Trip

I thought it would be useful to list what I ate during the trip, since it’s sometimes hard to get good ideas.

Breakfast

I kept breakfast pretty simple: two oatmeal packets and hot cocoa. This was easy as I just needed to boil 2-3 cups of water and I had a warm meal ready.

Lunch and Snacks

I had a peanut butter honey bagel sandwich for lunch every day. I also had the following to supplement lunch and eat as snacks each day: three granola bars, ~1/3 lb trail mix, dried peaches, and raisins or corn nuts.

Dinner

Mountain House meals are easy but expensive. I used a Mountain House one day.

Another day I used a $1 package of dinner noodles from Walmart. These are just as tasty as Mountain House, but the downside is they have to simmer for 7 minutes. Some of them also use milk, so I had some powdered milk to add as well.

The last day I did instant potatoes and some stew. The potatoes just require boiled water and a $1 package was very filling (2 cups). The stew had to simmer for 10 minutes, but it was very tasty.

Treats

I made pudding one night which was quite good. It just requires pudding, powdered milk, and cold water. Mix it all in a ziplock bag.

I also packed in my traditional tortilla chips and a jar of Salsa con Queso, which is not backpacking food at all but was really delicious!

Cost

Total cost of food for the three night backpacking trip was about $25. Not bad at all! The Mountain House was about 1/3 of that. I hiked out with a spare package of Top Ramen and two spare granola bars.

Wrap Up

The trip was a huge success. There were 20 people in our group and no one got injured or lost. There were no arguments or issues with the boys. Everyone had a good time and carried their own packs the whole way. Some of the boys struggled on the hikes a bit, but they all made it and still got to have some great experiences.

I had a wonderful time. There is something about high mountain peaks and mountain lakes that makes me love going back again and again. I’ve now seen almost every lake in the lower White Clouds, so I hope to hit some different areas next time around. That said, I wouldn’t hesitate to do this same trip again.